Monitor Calibration
Not all monitors are made equal. Even different monitors by the same manufacturer are sometimes not made with the same specifications, color contrast or software so in walks color monitor calibration also known as display calibration. Whatever we call it, this fancy term is designed to make our monitors look as close to another person so we can all look at a very similar color on the display.
Originally, calibrating was a frequent necessity for designers, gamers or anyone that wanted to see as close to the color that was meant to be seen due to the color shifting or color sliding of the CRT or cathode ray tube monitors. The color sliding of the color, contrast and white balance within the CRT monitor was quite frequent and monitor calibration was necessary a couple of times a month at the very minimum. With the invention of LCD or Liquid Crystal Displays, color shifting became less frequent but it is still required for us designers to calibrate our monitors.
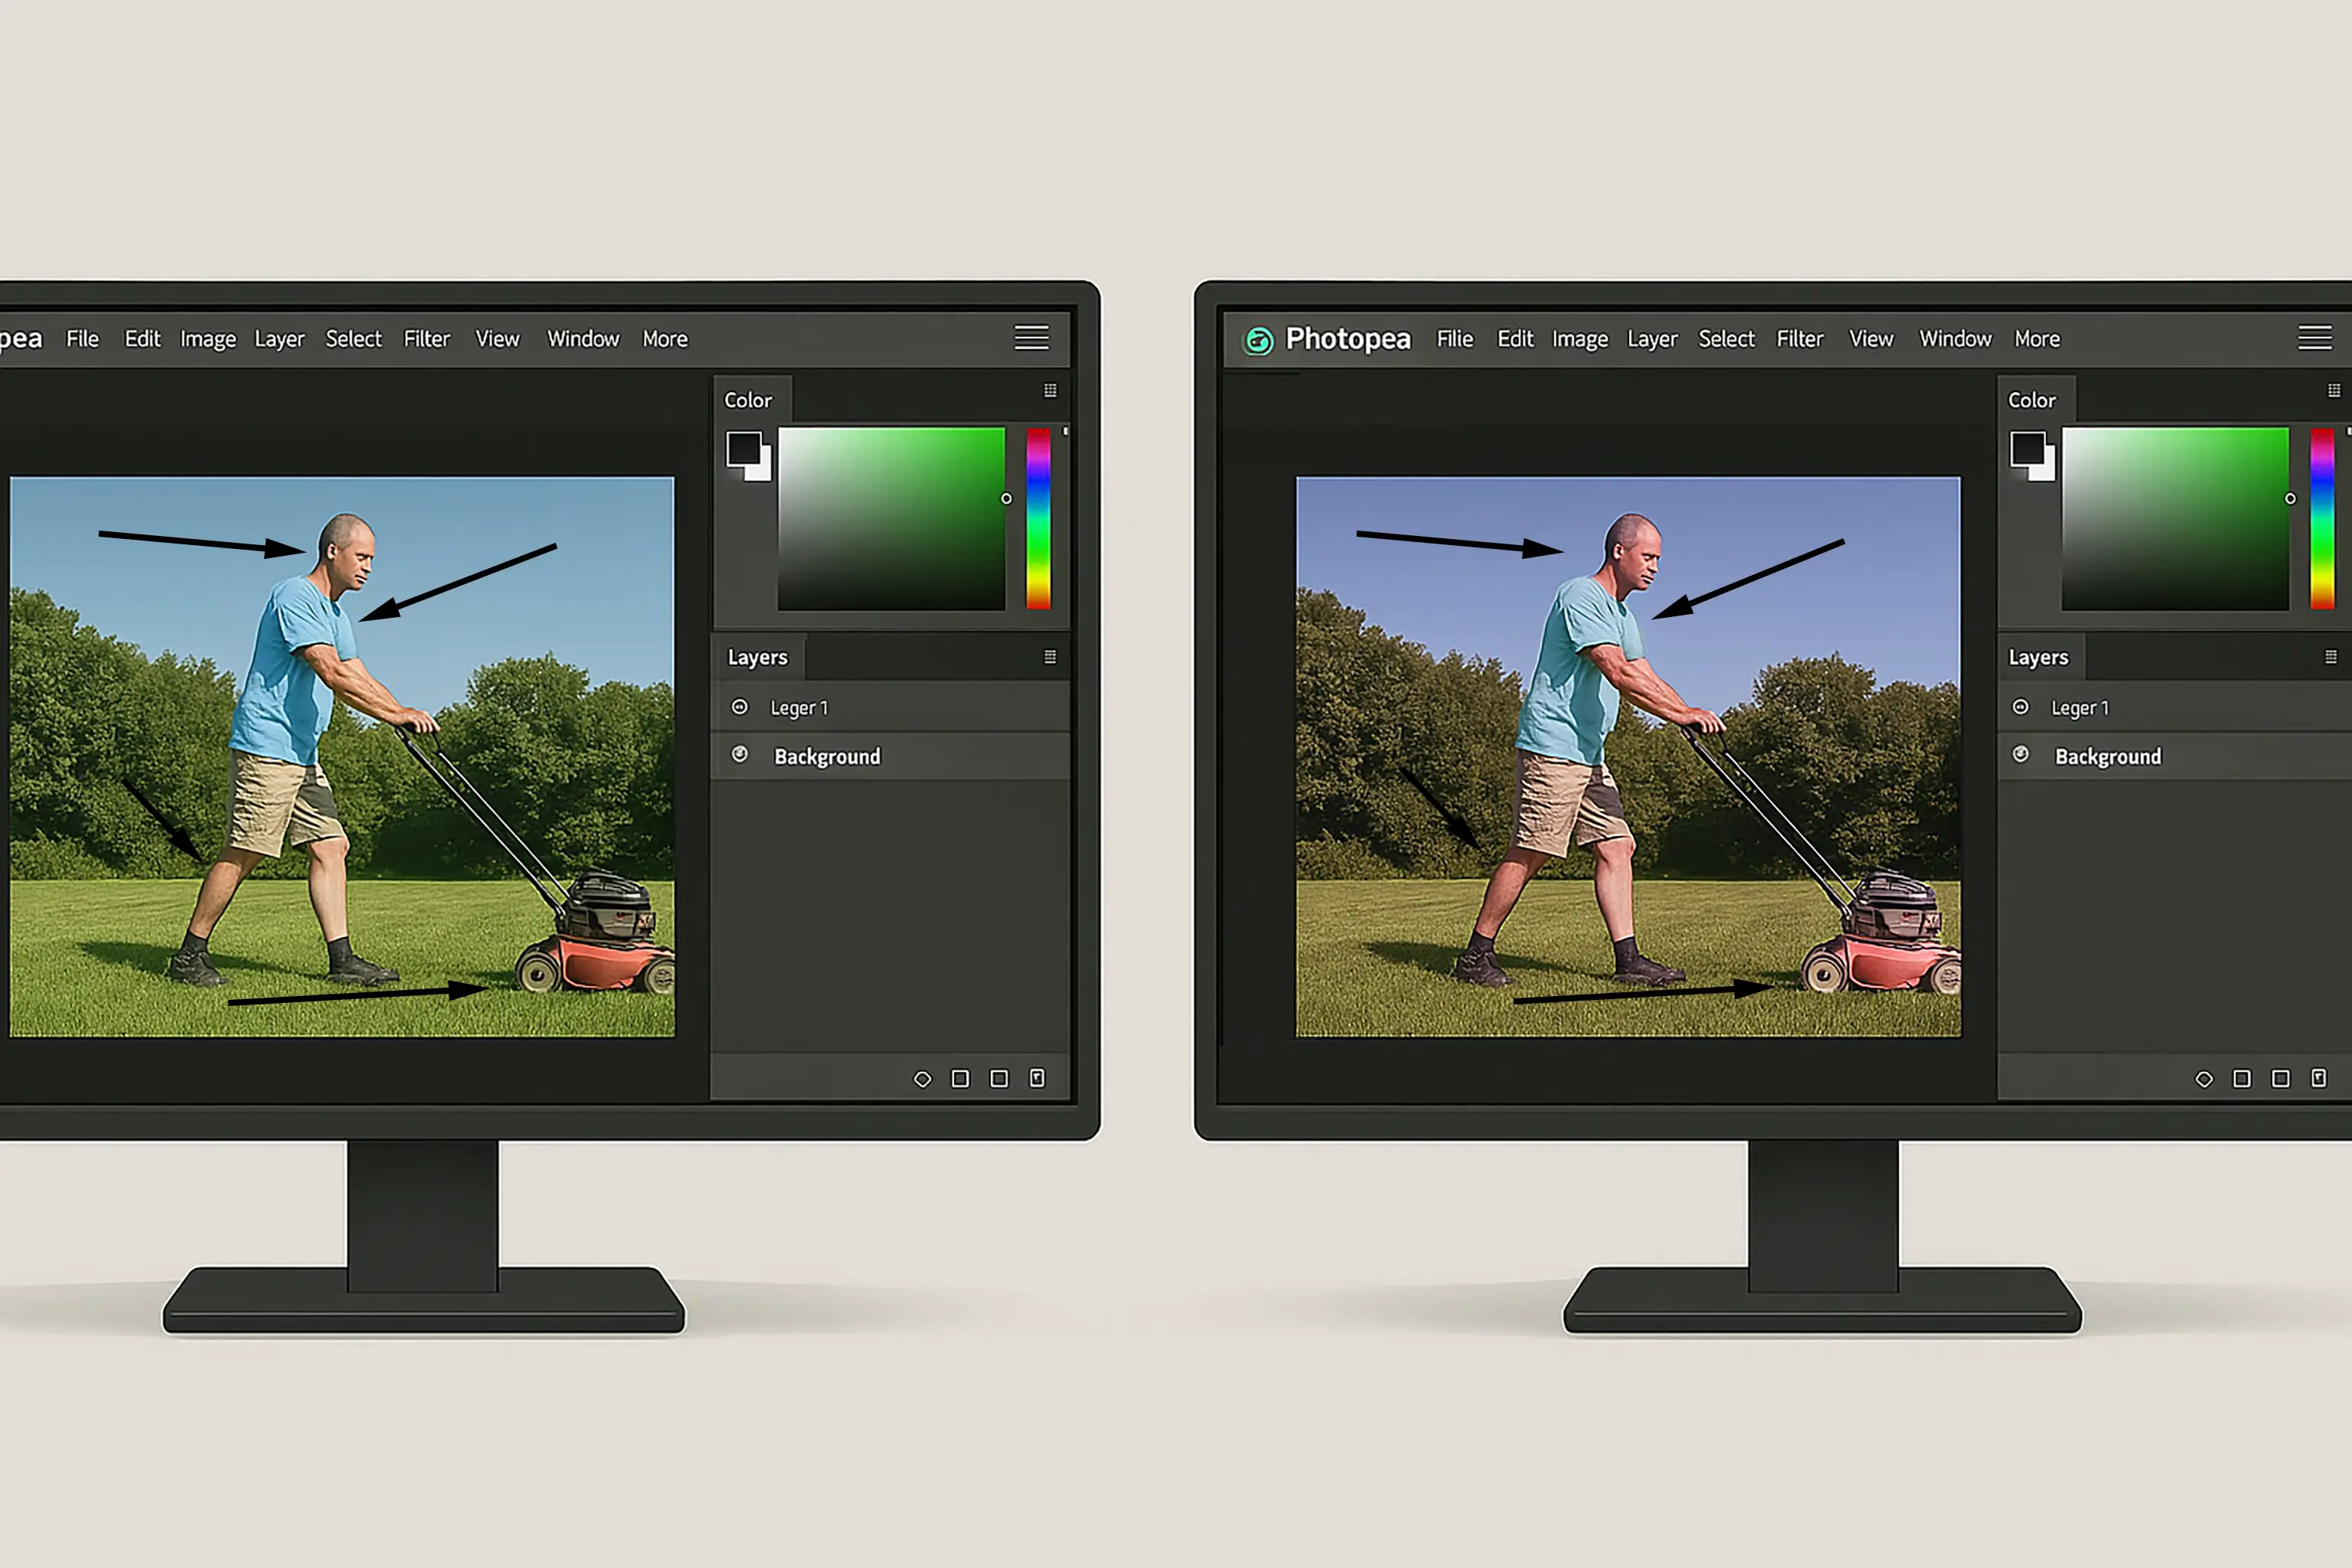
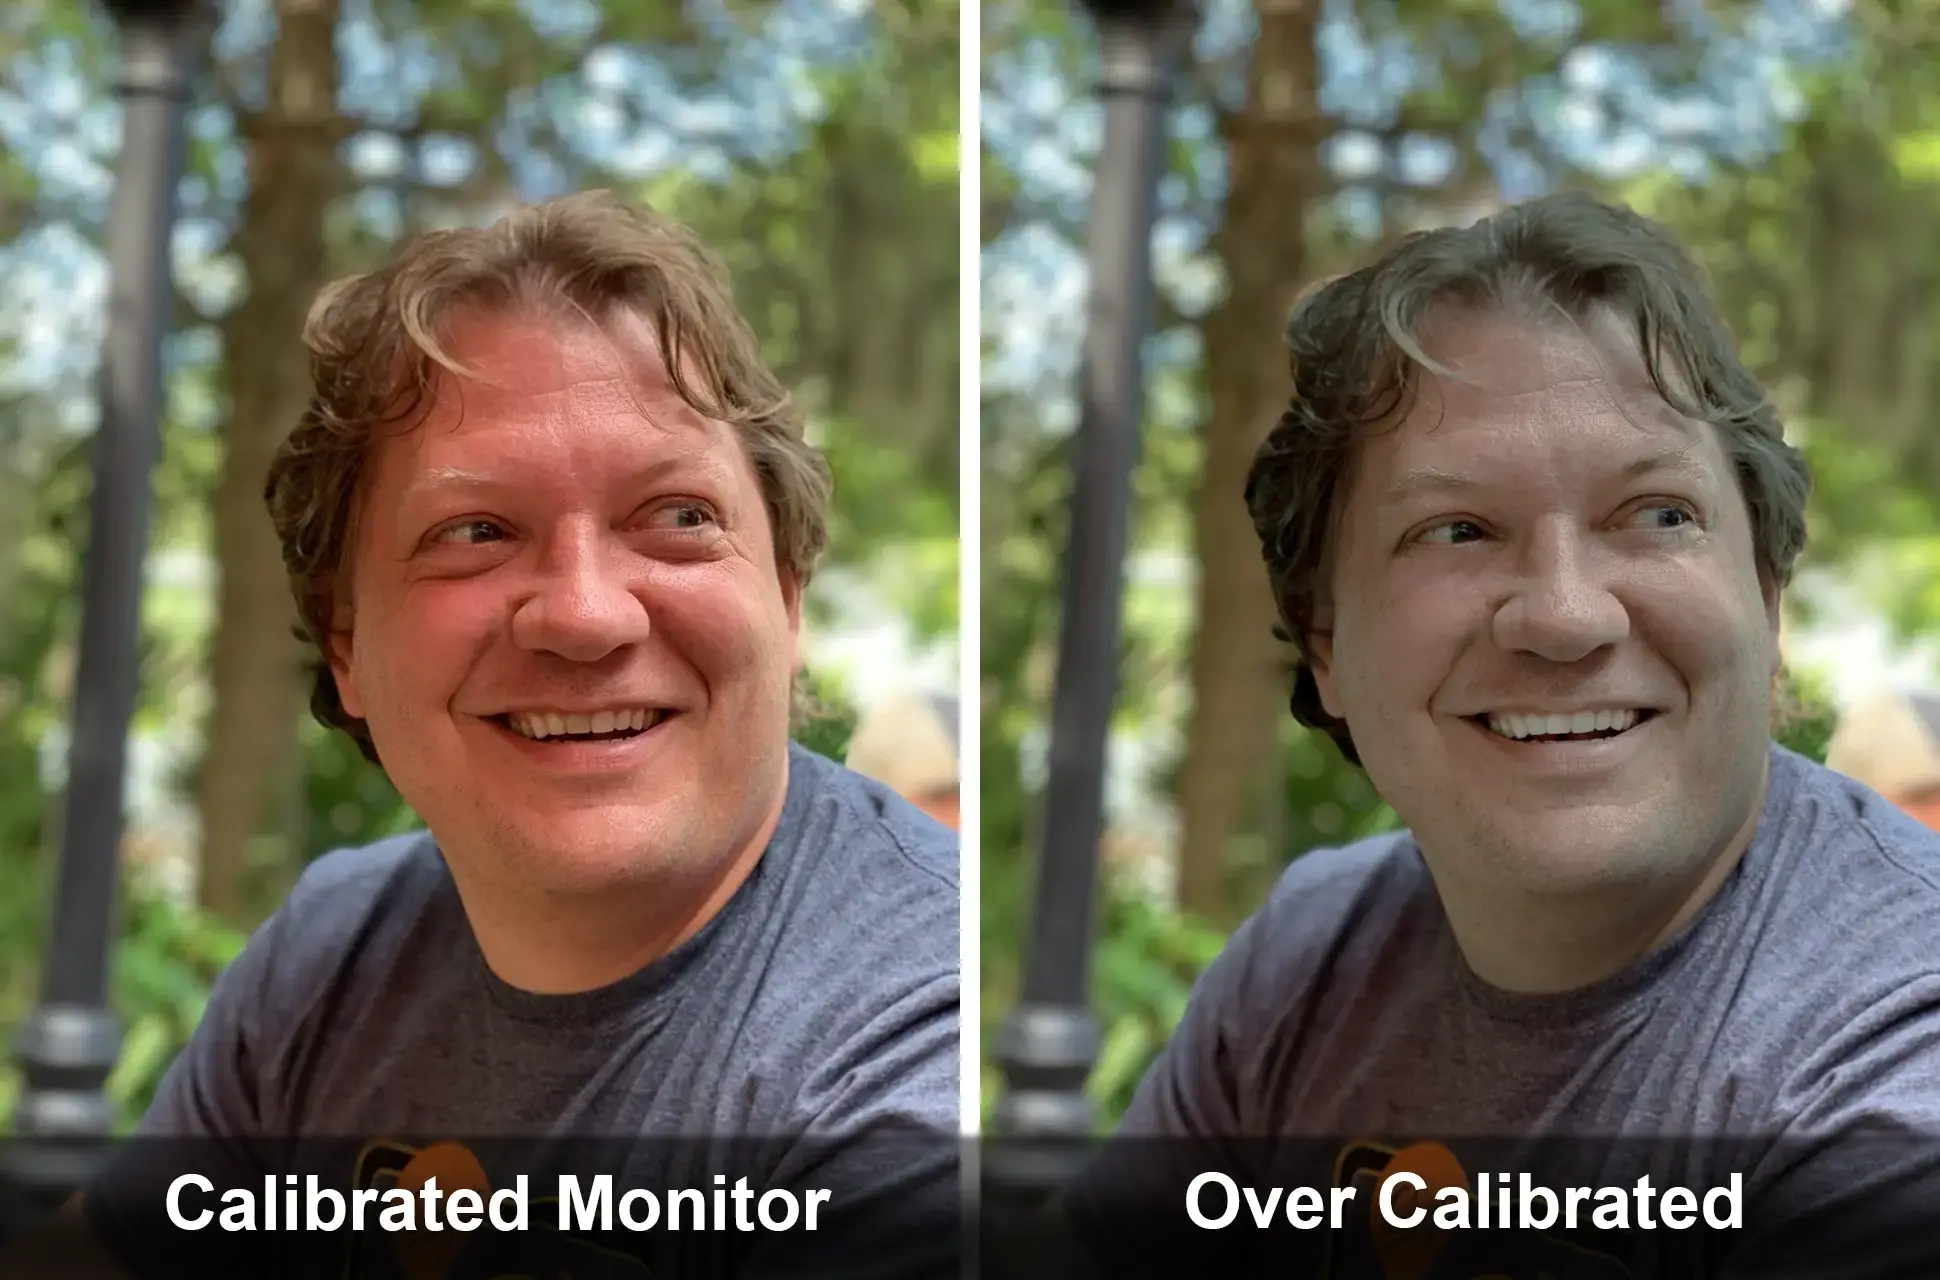
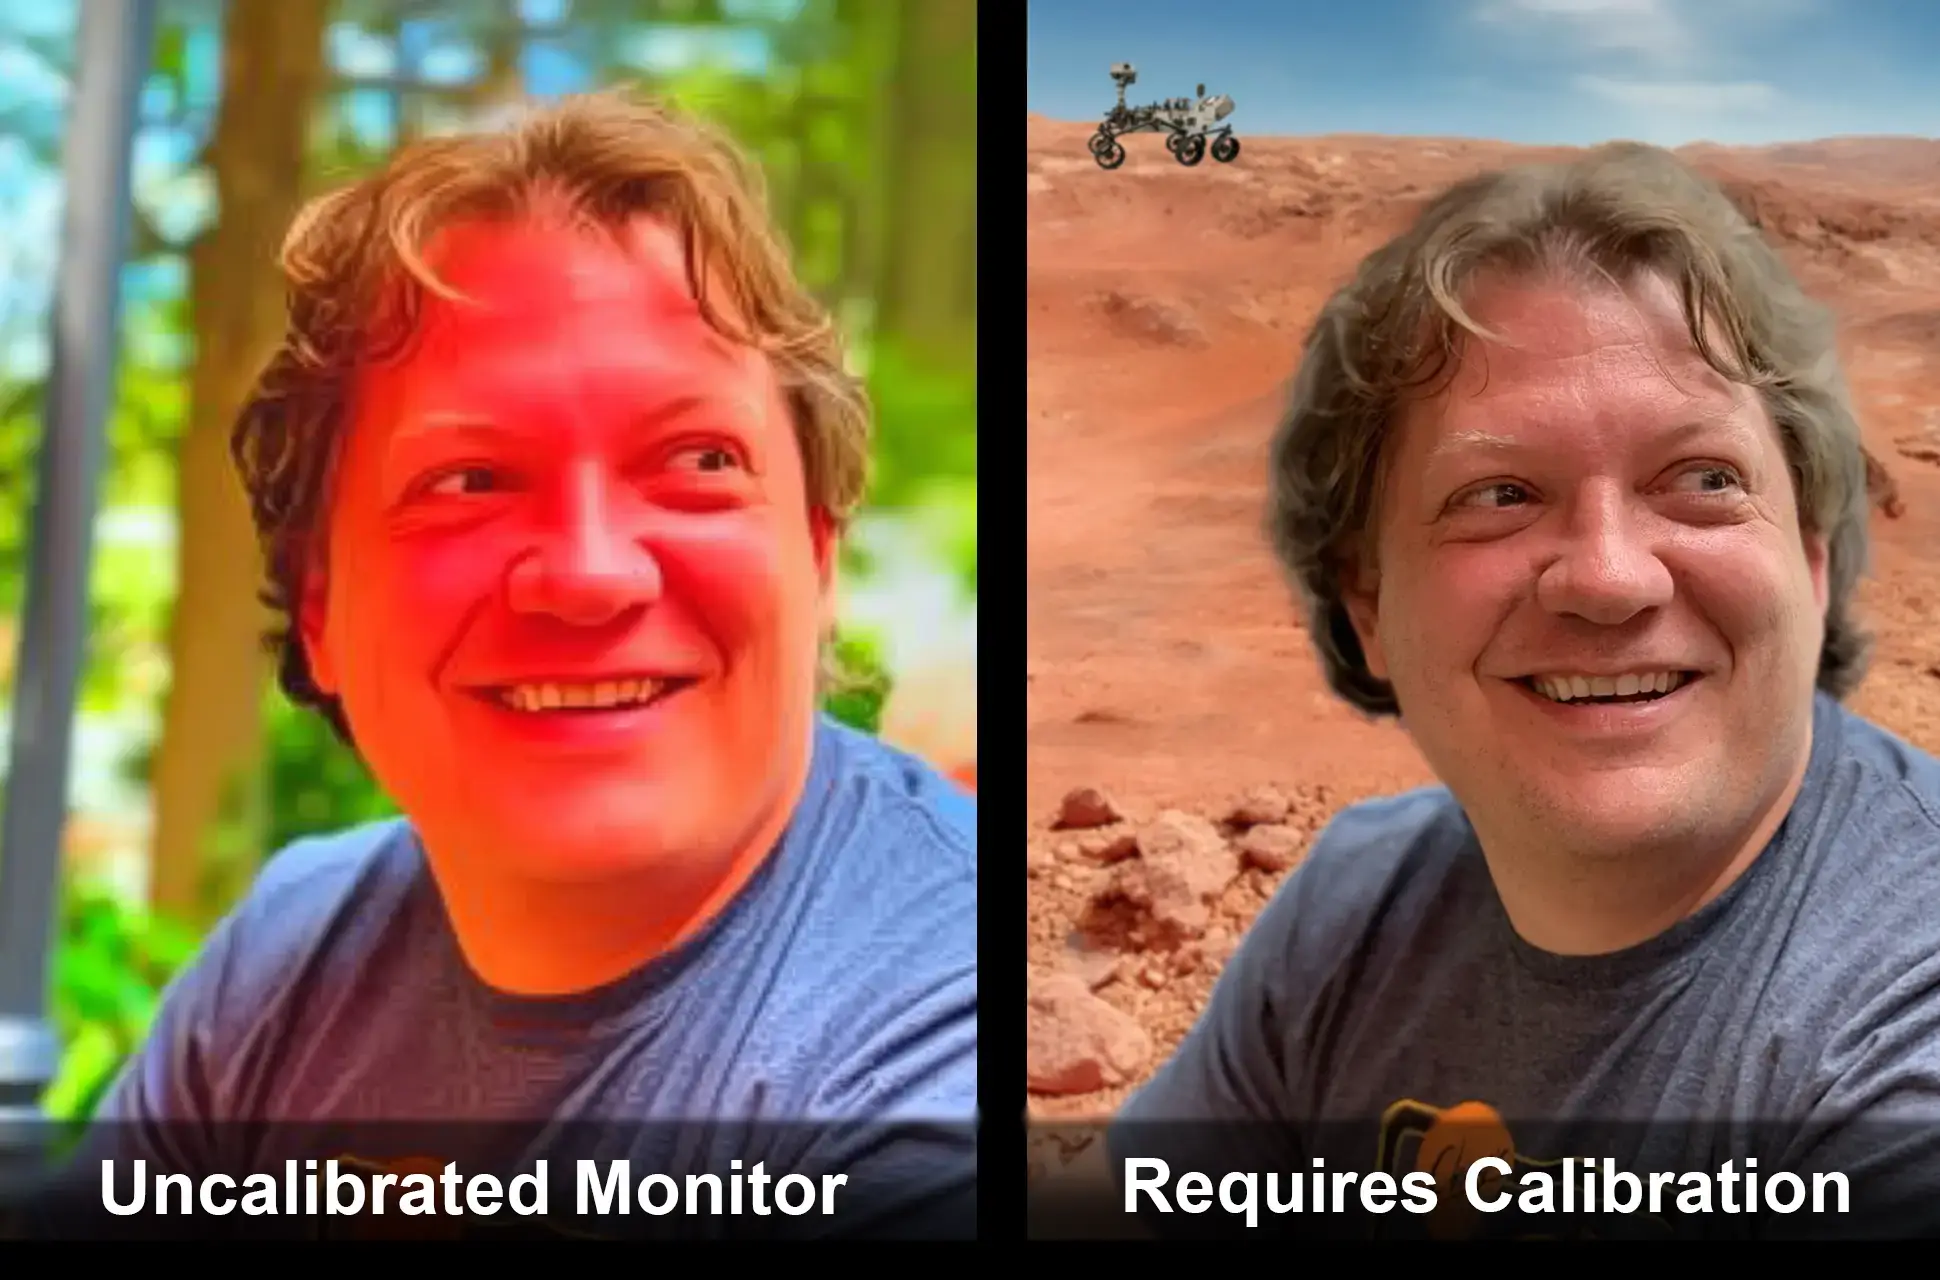
Does everyone calibrate their monitors? No, absolutely not. Excluding designers and gamers, most people we spoke with have never heard of monitor calibration, have never completed it on their monitors and would not know how to complete it if we asked them to perform a display calibration. As a photo editor, completing color monitor calibration is a necessity. We want those colors as precisely as we can get them on the display we are viewing. If we don't calibrate our monitors or if we over-calibrate our monitors, here is what can happen. These images are the same image on different monitors with a playful backdrop of mars because of how red the skin tone was appearing.
How often should we calibrate our color monitor?
How long does the monitor stay on when the computer is powered up? How many times do we turn our monitor on and off? How cheap or expensive is our monitor? At a minimum, once per month would be a good practice for color monitor calibration. Calibrating a color monitor more than once per month will not hurt it so feel free to calibrate it every day if so desired otherwise set it and only calibrate it when there is something noticeably different.
What can I calibrate?
There are quite a few items within a monitor that can be calibrated. Some of these are common sense when you see them while others are severely more technical oriented. A color monitor calibration or display calibration is not just about color. There are several items that come into the light when wanting to see the exact color that is meant to be seen in that image. While there are several items that can be calibrated, we will discuss seven of those that can be calibrated on a display.
Brightness Calibration
Without the correct brightness calibration, our monitor can output a much darker or washed out image on the display we are viewing. We want that correct amount of brightness to be shown to allow for the correct color to be displayed on the monitor.
Contrast Calibration
Using the correct contrast allows for displaying the correct coloring for shadows, darker areas, color vibrance and the proper correction between the darkest and lightest areas on the display. Contrast calibration allows for better color tones within the displayed image so the photo is distinguishable on the monitor.
Sharpness Calibration
Having or showing the correct sharpness for an image on the display is a necessity. Leaving sharpness too low will cause the images on the display to appear blurry whereas leaving the settings too high will cause the images to appear unrealistic on the display.
White Balance Calibration
The PC Mag encyclopedia provides us with a brilliant definition of white balance and probably the best we have heard. They state that for a computer monitor or display, white balance adjusts the red, green and blue pixel intensity. The monitor makes red, green and blue all equal by default but these can be adjusted to make the display warmer, more yellow, or cooler, more blue.
White balance calibration is important for our images. We want the image for which we are editing to be as close to the desired color as possible.
Most of the current monitors will have some setting available for white balance calibration.
Backlight Calibration
Touching base on this one if a television is being used as a monitor. The backlight controls the amount of light coming from behind the display. Too much backlight and this will brighten up the screen and can distort the intended color.
Color Temperature Calibration
The average color temperature on a monitor is 6500k. Some monitors do not allow for color temperature calibration. While color temperature can directly affect the view of the monitor, 6500k may cause eye strain and if this is happening, we can calibrate the color temperature to better suit our eyes.
ICC Profile Calibration
This ICC or International Color Consortium (ICC) profile is the file on the computer directly responsible for displaying the monitor's color output. As designers and photo editors, we need to ask ourselves, how do we get the most accurate colors for our display calibration. The answer is “by calibrating our downloaded ICC profile to match the On Screen Display (OSD) in our monitor settings” amongst the other items listed in this tutorial.
Every monitor or display has a set of instructions or a profile to follow in order to display color accurately on the screen. This profile or file defines the mapping the display uses to show the color. The ICC profile assigns the color gamut that will be displayed on the monitor. By ensuring the ICC profile accurately matches the OSD settings in the monitor, we can ensure we are outputting accurate colors on the display.
The settings available within the OSD can vary from device to device but typically we will have access to:
- Brightness
- Contrast
- Defaults also known as Presets
- Gamma
- Saturation
- Temperature
Tech Porn put out wonderful and informative instructions for ICC Profile Calibration.
In their article, they also provide a link to a major source for ICC Profile Downloads from TFTCentral in the UK.
Windows Computer Calibration
Monitor Drivers
The first commonly asked question on this subject that we receive is “what is a driver”. The simplified version of this answer is “a driver is a file with a set of instructions that tells the piece of hardware how to work properly”. For a monitor, there are simplified drivers supplied by the operating system software companies like Microsoft or Apple and there are more complex drivers supplied by the monitor manufacturer. Apple has a pretty decent record of providing good drivers off the bat so it may not be necessary to update the drivers on a Macintosh. Microsoft has an extremely long history of providing basic or wrong drivers for monitors so locating the monitor's proper drivers is a must for proper display calibration.
How do I find a driver for my monitor?
This involves knowing who manufactured the monitor and the model of the monitor. Some extremely cheaply made monitors may not have drivers available to them and then the basic driver supplied by the operating system manufacturer must be utilized.
A quick Google search will help look for the proper driver. For example, if we have a Dell monitor then we know the manufacturer. If the model is a SE2722HX then we have our search term. We would search for Dell monitor SE2722HX driver download in Google and the first result returned is typically the page for which holds the driver we wish to download and install into our computer. The model of the monitor is typically located on a sticker on the back of the monitor.
How do I install a driver?
This can be anything from extremely easy to very difficult. There are several methods to install a driver depending on the manufacturer of the monitor.
Most of the time, we have a zip file that we must open and extract all the files from the zip file to a folder somewhere on our computer that we can locate later. Once the files are extracted, we will usually see an installation file such as a .dmg for Apple or a .exe or .msi for Microsoft. We want to ensure we are using the driver that is designed for our operating system as well but there may only be one driver available. We can typically run these files that usually are named something to do with setup.exe or driver-install.msi or even monitor.dmg. After we have opened the file, we follow the instructions and as long as we do not receive any errors, we are completed.
In the instance where there is no executable file and all we have are .ini and .dll files then, in Windows, we must manually open the device manager, locate the display adapter driver, right click on that display adapter driver and update driver. Then we need to tell the operating system to allow us to manually point to the driver files. {Wayne - Create a video showing this process}
Windows Calibration
There are two different possible types of display calibrations within the Windows 10 and Windows 11 operating systems for which we should be aware. There are instructions for display calibration for viewing correct colors on the monitor and for High Dynamic Range (HDR) video streaming.
Enabling HDR allows the monitor to display a wider range of colors and contrasts. While this sounds fantastic, Microsoft claims on their website that HDR is for built-in displays and external displays cannot be calibrated. If the external monitor has HDR capability, this can be enabled but we do receive a message stating “On external HDR displays, this setting the brightness of standard dynamic range (SDR) content relative to high dynamic range (HDR) content so we are going to discuss how to calibrate it here. The external display being used may not have the option to enable the use of HDR.
The “Use HDR” option is disabled by default. When the “Use HDR” option is enabled it will severely affect the monitor's color display. Use extreme caution when enabling this setting. Microsoft is historically famous for changing its web content addresses so we will provide a link along with the instructions here on this page for calibrating the HDR option in Windows 10 and Windows 11 just in case this setting is desired.
Windows 10 HDR Calibration (For built-in displays only. Use Extreme Caution)
The computer must be running Microsoft Windows 10 version 1803 or later. The HDR option was not available prior to this version.
- Select the Start ⊞ button
- Type HDR
- Select Windows HD Color Settings
- Under Stream HDR video, select Windows HD Color settings.
- In Windows HD Color settings, select your laptop display under Choose display. Make sure the Settings window is on your laptop display.
- Select Change calibration settings.
- On the HDR video calibration screen, select Full screen for the sample video.
- On the Calibrate your display screen, drag the slider at the bottom to the left or right.
- When calibrating your display, the goal is to get a good balance between details in darker parts of a scene (in this case, the windows in the buildings on the left) and brighter parts of it (here, the snow at the top of the mountain).
- To add more details to the snow on the mountain, drag the slider to the right.
- To add more details to the buildings, drag the slider to the left.
- When you're happy with the results, select Exit full screen in the bottom-right corner.
- Watch streaming HDR video in a supported video app and look at the video quality.
- If you're not happy with how the video looks, go back to step 5 and calibrate your display again.
- If bright scenes in the video were washed out, drag the slider to the right.
- If dark scenes in the video didn't have a lot of detail, drag the slider to the left.
- (Optional) To go back to the original calibration settings, on the HDR video calibration screen, select Reset calibration.
Windows 11 HDR Calibration (For built-in displays only. Use Extreme Caution)
- Select the Start ⊞ button, then enter settings. Select Settings > Display.
- At the top of the Display screen, select your built-in display.
- Select HDR or Use HDR, then select Display calibration for HDR video.
- On the Display calibration for HDR video screen, select Full screen for the sample video.
- On the Calibrate your display screen, drag the slider at the bottom to the left or right.
- When calibrating your display, the goal is to get a good balance between details in darker parts of a scene (in this case, the windows in the buildings on the left) and brighter parts of it (here, the snow at the top of the mountain).
- To add more details to the snow on the mountain, drag the slider to the right.
- To add more details to the buildings, drag the slider to the left.
- When you're happy with the results, select Exit full screen in the bottom-right corner.
- Watch streaming HDR video in a supported video app and look at the video quality.
- If you're not happy with how the video looks, go back to step 5 and calibrate your display again.
- If bright scenes in the video were washed out, drag the slider to the right.
- If dark scenes in the video didn't have a lot of detail, drag the slider to the left.
- (Optional) To go back to the original calibration settings, on the HDR video calibration screen, select Reset calibration.
Windows 10 and 11 Display Color Calibration
- Select the Start ⊞ button.
- Type Calibrate.
- Choose Calibrate display color.
- Read the instructions and select Next.
- Read this next set of instructions and review the images then select Next.
- Calibrate the Gamma by using the slider then select Next.
- Read the instructions about brightness then select Next.
- Review the images and get ready to calibrate the brightness then select Next.
- Adjust the brightness on your monitor to ensure it matches the previous images then select Next.
- Review the images for contrast and select Next.
- Adjust the contrast if necessary then select Next.
- Review the images for neutral colors then select Next.
- Adjust the color sliders if necessary then select Next.
- Finally, review the previous calibration and the new calibration and see which one is preferred. If the new one is preferred select Finish.
- Text Calibration will appear next. There are 6 screens. Choose the easiest to read on each screen.
Mac OS Calibration
Apple computer operating systems have a lot of advantages and disadvantages when compared to a Windows operating system. While Apple computers are not intuitive, there is a lot in an Apple computer that is made extremely easy and monitor calibration assignment is one of those. Display calibration for a typical home environment using macOS is not typically necessary but for a designer or photo editor, we do want the best color we can see.
Performing display calibration on a Mac is simple when we finally have the instructions. The following steps are for macOS 13 Ventura. The instructions change slightly from version to version for macOS. If instructions are needed for a different version, there is a drop-down menu at the top of the macOS display calibration page.
- Choose the Apple menu.
- Select System Settings.
- Select Displays (This should be located in the sidebar and depending on the resolution of the monitor, scrolling may be necessary).
- Click the pop-up menu next to Color Profile on the right side.
- Choose Customize. This shows a list of color profiles along with the color profile for the current display.
- Open the Display Calibrator Assistant by clicking the Add button (+ plus sign).
- Follow the instructions. The length of the calibration depends on the monitor being calibrated and its capabilities.
- After the calibrator assistant is finished the display profile is automatically assigned to the current monitor.
Online Calibration Utilities
The online tools for display calibration work with contrast and brightness. While these tools are typically done using our eyes and not with mechanical precision, they do work quite well, especially when in a pinch if we find ourselves working with someone else's display that has the default calibration on their monitor.
Photo Friday
www.photofriday.com/info/calibrate
They have a very easy method of simple display calibration that is very easy to follow. If the lights are not able to be dimmed then this may not be the best website to use for display calibration.
The Lagom LCD monitor test
http://www.lagom.nl/lcd-test (Note: This website does not support https so use that website at your own risk. It is purposely not a clickable link and must be copied and pasted.)
For those of us super geeks that really want to dig down and test several aspects of the LCD color monitor calibration such as brightness, contrast, clock/phase, sharpness and gamma then this website is just that! These tests are probably the most comprehensive tests I've seen for online tools but they will take a bit to get through and they are not intuitive so read the instructions. These tests also require the environment to be dim.
Please note there are other online calibration software utilities on the Internet. We tested a lot of them and the two above are the two we liked the best that we felt had the instructions to help users know what to do when performing a display calibration on their color monitors.
Calibration Software
There are quite a few pieces of software out there to assist with color monitor calibration or display calibration. We have limited this list down to the 2 tools we find to be the easiest to use and appear to be quite accurate. Two of the tools are free and the other is a purchased piece of hardware for the truly dedicated photo editor that wants the most precise monitor calibration money can buy.
DisplayCal
https://displaycal.net
This software runs on Windows, Linux and Mac. They also provide the source code for the software, screenshots and a quick start guide. It is highly suggested to use the quickstart guide before beginning to use this software. This will provide accurate results for monitor calibration with comprehensive testing.
SpyderS by Datacolor
https://spyderx.datacolor.com/shop-products
The SpyderX Pro is currently $170.00 US and the SpiderX Elite is $270.00 US at the time of writing this tutorial. This is the most comprehensive and serious piece of hardware that can be purchased for color monitor calibration. When it is decided that we are purchasing a monitor that deserves this type of calibration now we have a product to go along with our expensive taste.