Overview
Resizing images consists of more than just reducing the image file size. This tutorial explains the terminology and shows the methods for a majority of the different reasons that would require resizing images. We even list places where you can resize images online. There are several methods which will result in resizing an image. There is also a big difference between resampling and resizing images. This is considered a more advanced subject but we will briefly speak about that subject and provide another website where more information can be found.
Terminology
It is important to understand the terms involved that make up different types of images in order to understand the resizing methods. There are terms such as pixel and vector that will need to be known.
Pixel:
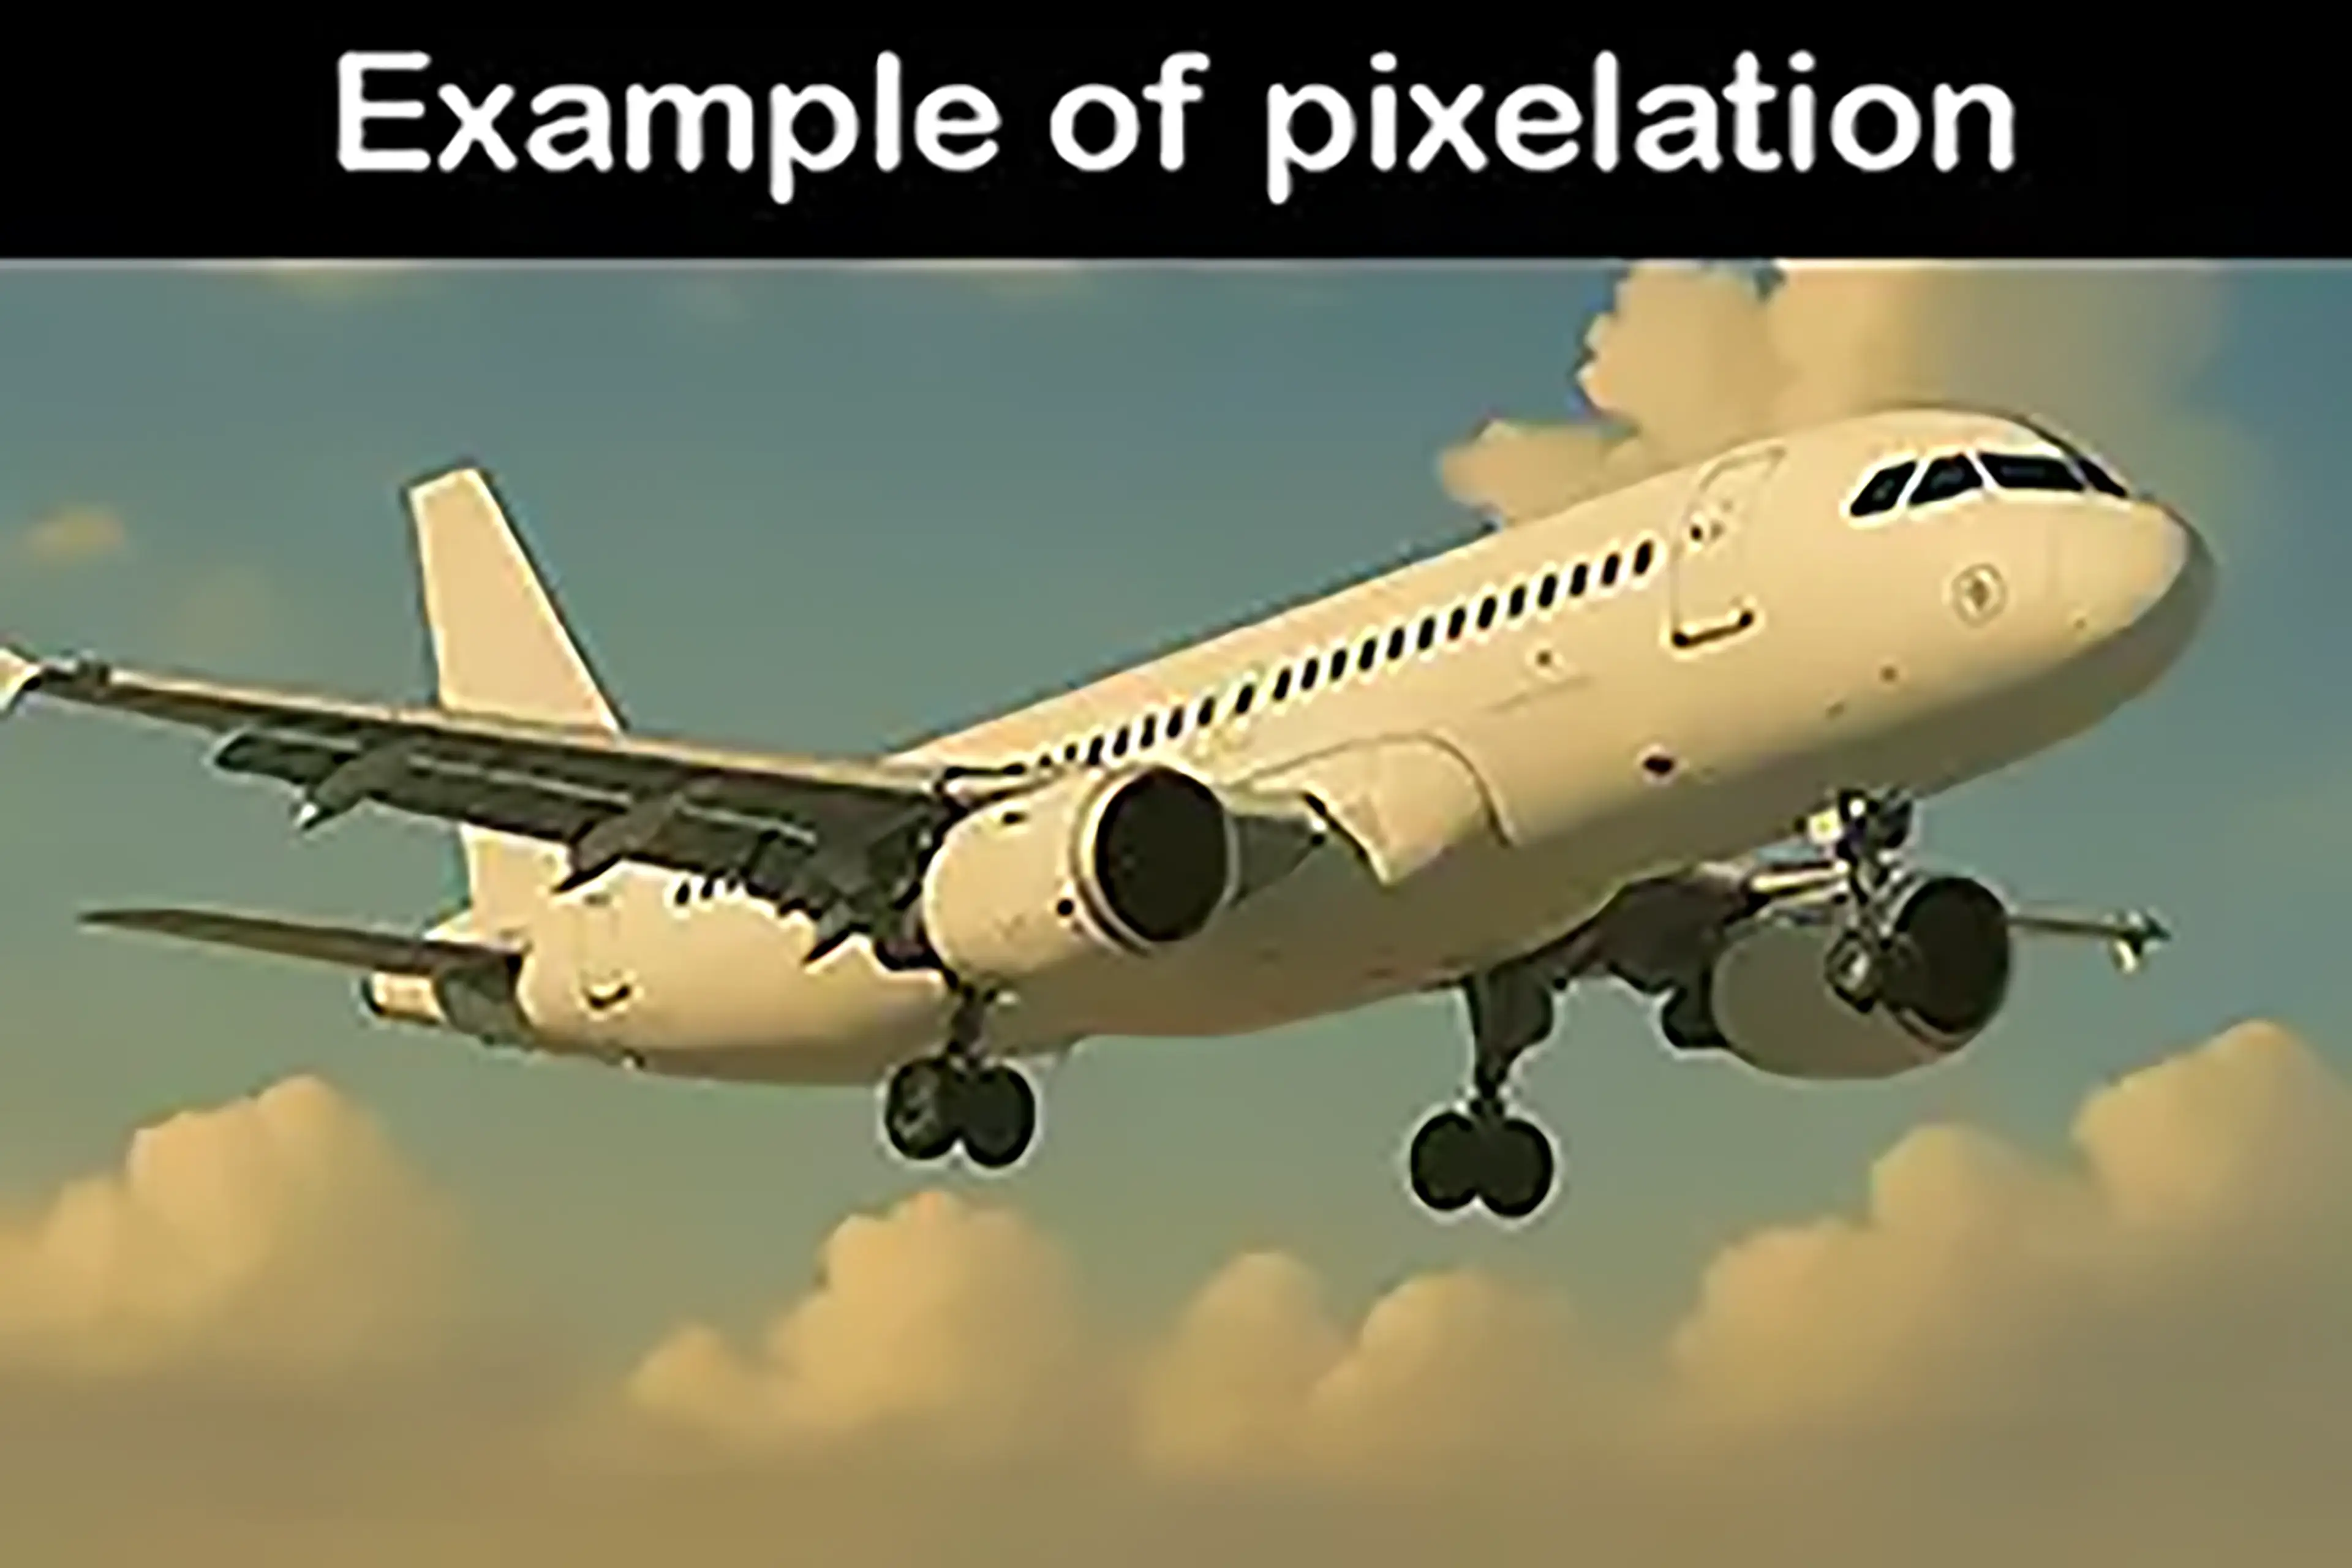
A pixel is a type of measurement utilized within digital images. This is the most common type of image construction. A pixel is tiny squares that can contain a variety of colors to construct an image. If you are currently wondering, how do you make a circle with tiny squares, you are not alone. We can provide the appearance of circles but we cannot make a perfect circle with pixels. The most common place to find pixels is the monitor for which is being used to view this webpage. This may be a phone, tablet, computer but all have a resolution with them constructed from pixels. For example, a screen resolution of 3,840 by 2,160 represents 3,840 pixels from left to right and 2,160 pixels from top to bottom.
The airplane image shown has been purposely resized smaller than necessary to show an example of pixelation when increasing the size of the image. Click or tap on the image to see an example of pixelation when attempting to increase an image that doesn't have enough pixels.
Vector:

A vector is a mathematical equation representation using lines and shapes to form the image. As a result of this type of construction, vector images can increase in resolution size without losing their composition. The computer doesn't need to guess what color needs to fill into the spot next to them when increasing their size. The downside to vector imaging is their lack of color profile and details. These images will typically result in more of a cartoon appearance than lifelike. Vector images do solve the problem with increasing the resolution of the image size when resizing images.
Here is an image provided as a vector image.
Canvas:
The definition of a canvas is technically the workspace for which images can be created or designed. Does that actually tell us what it is though? No, it does not. The canvas is the placemat behind image layers that are placed on top of it. The canvas defines the height and width constraints for the project.
Resample an Image:
This means to change the number of pixels within the image.
Resize an Image:
This keeps the same amount of pixels but changes the height and / or width of the image.
Aspect Ratio:
The shape of an image. There are a few main aspect ratios utilized between real world photography, printing and Internet usage.
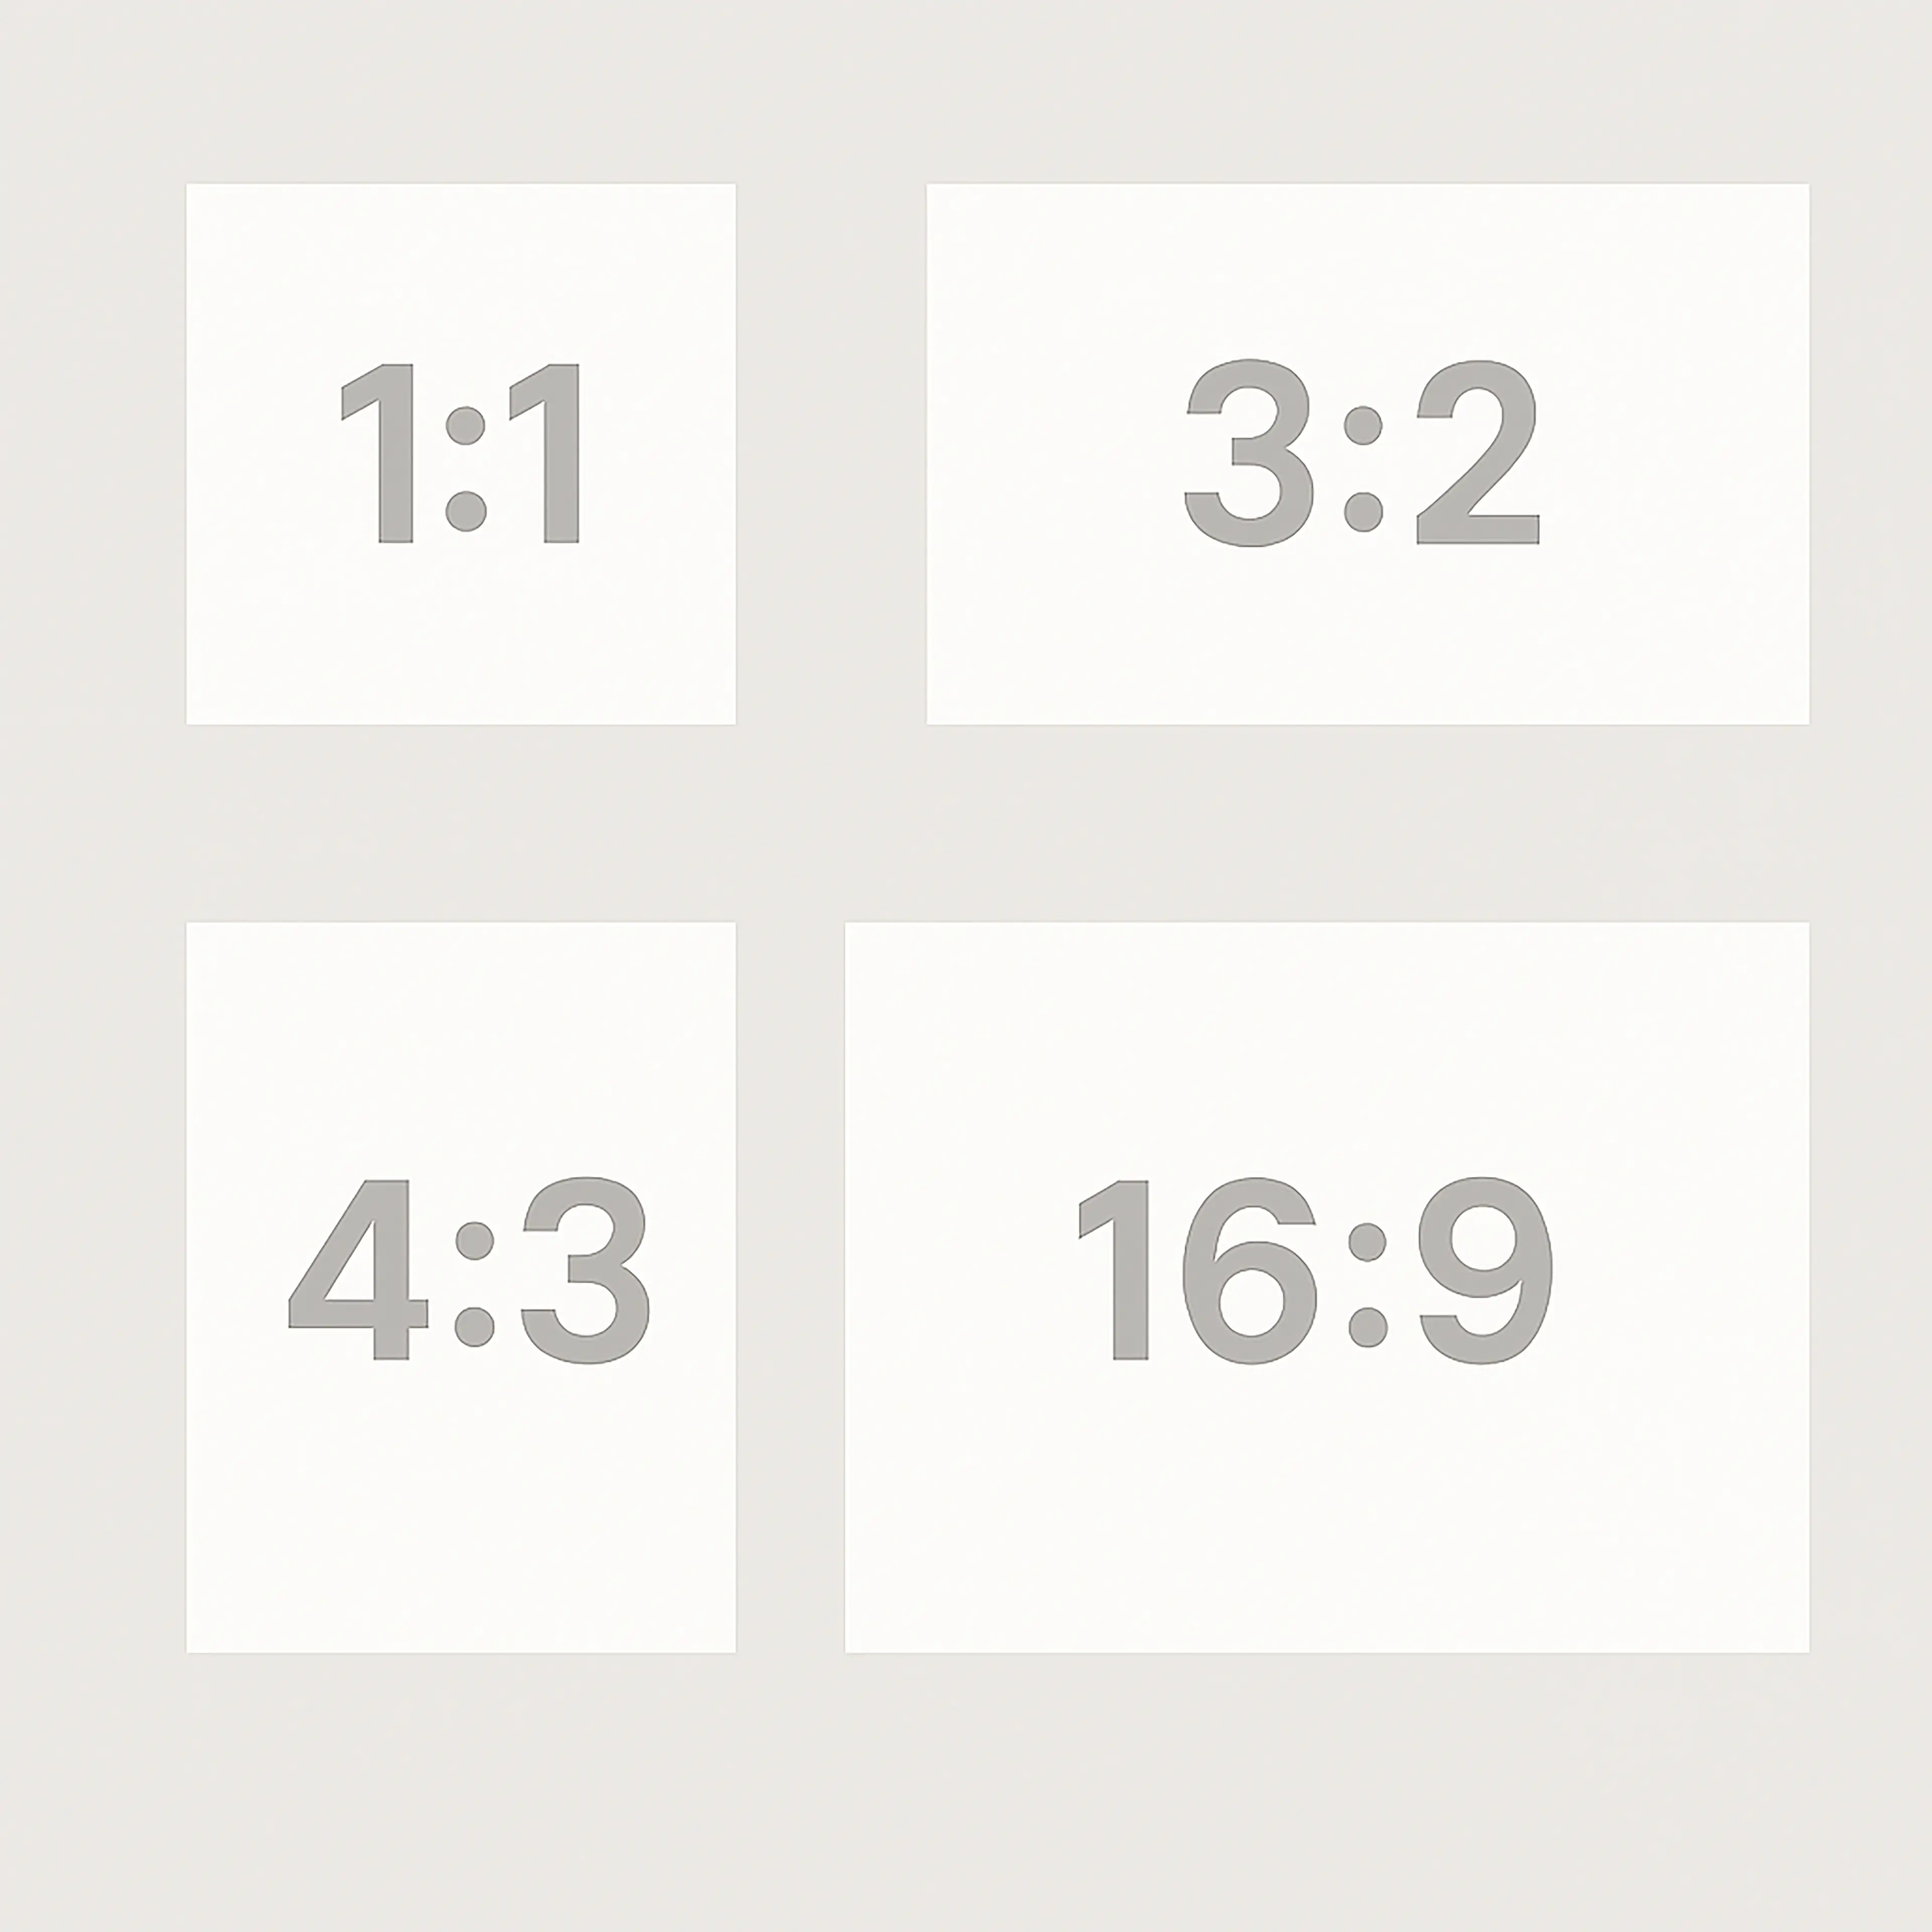
1:1 can be thought of as an increase of 1 pixel in height by 1 pixel in width when resizing an image. This creates an equal distribution of pixels across the image or canvas essentially creating a square.
3:2 can be thought of as 3 pixels by 2 pixels either height or width when resizing an image or canvas. 35mm cameras utilize this ratio.
4:3 can be thought of as 4 pixels by 3 pixels either height or width when resizing an image or canvas. Older non-high-definition monitors, non-wide-screen televisions and some digital cameras utilize aspect ratio.
16:9 can be thought of as 16 pixels by 9 pixels either height or width when resizing an image or canvas. This is the most common aspect ratio for modern computer monitors and wide screen televisions.
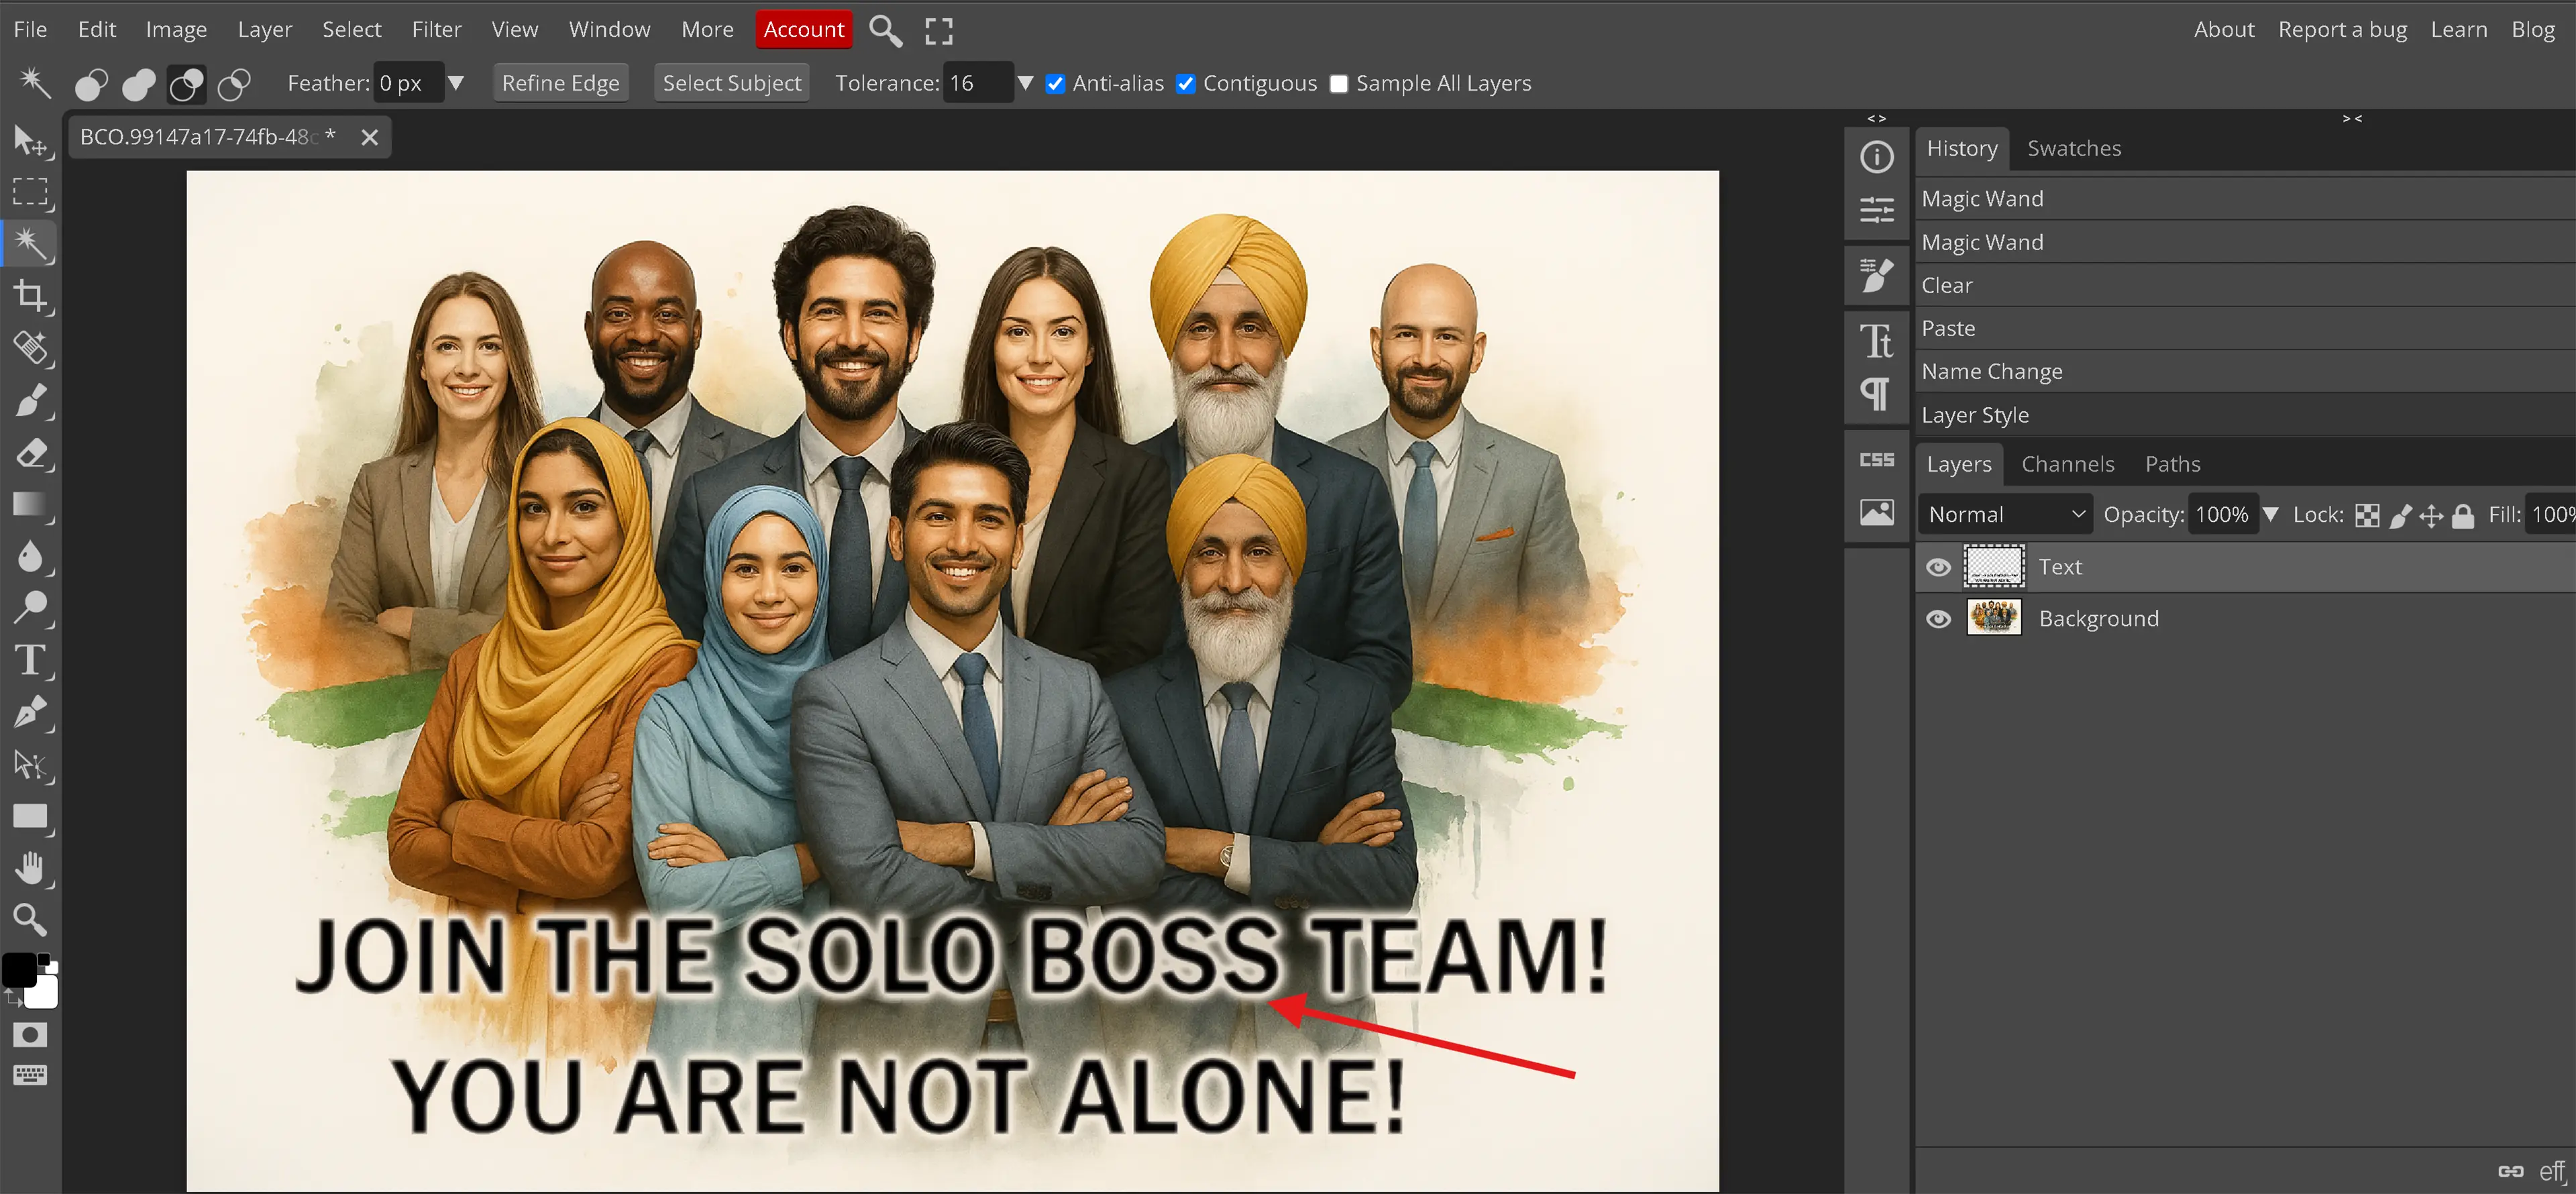
Layers:
Different images contained within its own section.Editing sections of 1 layer does not affect the other layers. By default, there is a canvas and layer 1 or the original image layer.

Resizing Images Online
When people talk about resizing images online, they will typically mean the reduction of the pixels within an image. This results in a smaller resolution and smaller file size. Not all image resizing websites are made equally. Some of those resizing image online websites allow for only specific file types while others require some technical knowledge such as how many pixels or how many kilobytes is desired for the final outcome. Usually when resizing images online, the user is looking for websites such as the following:
- www.adobe.com/express/feature/image/resize
- imageresizer.com
- www.simpleimageresizer.com
- www.iloveimg.com/resize-image
- biteable.com/tools/image-resizer
- picresize.com
- www.wix.com/tools/image-resizer
- www.befunky.com/features/resize-image
- www.easy-resize.com/en
- www.resizepixel.com
Resizing an Image
While there are many various definitions to resizing an image, we are going to presume pixel reduction for this section. When resizing an image in Photopea, click Image on the menu bar at the top of Photopea and then click on Image Size from the menu options. This will open the Image Size window. The Image Size window will have several different options.
- A drop down menu defaulted to Pixels. The other options, Percent, Millimeters, Centimeters and Inches are also available from that drop down menu. This allows us to choose from which measurement standard we would like to use when resizing our image. For the examples in this tutorial, we will use pixels.
- We have Width and Height. There is a chain next to the width and height. This is to tell Photopea to automatically adjust the value of the other one that isn't changed to keep the aspect ratio of the original image. Photopea won't update the value until we have clicked out of the box after we adjusted whichever value we chose.
- There is a DPI option that is defaulted at 120. This is typically utilized for printing purposes. The rule of thumb is the more Dots Per Inch (DPI), the better the quality of the image, however there is a point at which you won't visually see the quality increase. An average at the time of writing this tutorial, 300 DPI will work for text but for projects that require printing extreme detail, 600 DPI is best.
- The resample checkbox decides whether we resample or resize the image and this goes into advanced knowledge that is beyond the scope of the intended purpose of this tutorial, but for image resizing we will discuss the basics of it.
When would I use the different resampling options?
Nearest Neighbor: When resampling an image and working with land mass, trees and other objects that do not require extreme definition.
Bilinear: This is a very advanced option that is typically used when not changing the size of the image but needing to resample it. We won't go more into this option in this tutorial.
Bicubic Sharper: When decreasing the size of your image.
Where can I learn more information on resizing versus resampling?
Steven Patterson wrote an advanced skill level tutorial on this subject on the Photoshop Essentials website. While this tutorial is about Photoshop, the concept and explanations of resampling versus resizing still apply. More information can be found in his tutorial here:
www.photoshopessentials.com/essentials/resizing-vs-resampling
Resizing the Canvas
This option will not automatically adjust the size of the image layer during this image resizing process but instead will resize the canvas around the image. The canvas works similar to the Image Size option. When resizing the canvas in Photopea, click on Image on the menu bar at the top of Photopea and then click on Canvas Size from the menu options. This will open the Canvas Size window. The Canvas Size window will have a few different options.
- Height: When the relative checkbox remains unchecked, this is the current height of the image in the measurement type selected.
- Width: When the relative checkbox remains unchecked, this is the current width of the image in the measurement type selected.
- Measurement Type: Pixels, Percent, Centimeters, Millimeters, Inches
- Link: Automatically adjusts the height or width to maintain the aspect ratio of the original image.
- Relative: Marks height and width as 0. Height and width can now accept negative numbers as input.
- Anchor: The center around where the action will take place. For example, if the anchor is moved to the left side then any adjustments to the width of the canvas will take place on the right side of the canvas only.
When resizing the canvas, it is important to understand that Photopea does not instantly crop the original image when resizing the canvas to a lower measurement type than the image layer. The original image layer remains intact but the sides of the image layer are hidden. The image can still be resized or resampled, as discussed earlier in this tutorial.
Increasing the height and width in the canvas size options also will not automatically adjust the image layer but instead will create a larger canvas size around the image layer.
Standard Image Sizes
Unfortunately for us, as image editors, each major website makes up their own rules on what size images they will accept. This means that we must know the image size requirements for each website for which we desire to use. While we cannot list every website's requirements on the Internet, we will list the image resizing requirements of the top websites at the time of writing this tutorial. These requirements are listed with the understanding that these websites can and will change their requirements without notification to us. Fortunately, most printing options are standardized and that makes our job a little easier. During our research phase for this tutorial, we discovered a really nice article by Adobe but if you are not in the United Kingdom, Adobe tries to redirect you to webpages for the country where the computer resides and this typically results in redirecting the user to an article that doesn't exist. Be advised that not everything in that article is accurate information when it comes to web sizes. The intermediate skill level article is located:
www.adobe.com/uk/creativecloud/photography/discover/standard-photo-sizes.html

Standardized Print Sizes
These print sizes will be displayed in inches and not pixels. When we discuss print size, it will be discussed in measurement type inches while quality will be discussed in pixels and DPI. It is important to note that the standard print sizes listed below are the top 4, most common and not the only print sizes. For example, there are wallet and large frame print sizes not listed below.
4” x 6” image: This is a 3:2 aspect ratio and is the most commonly printed image. Image size should be at least 1,200 pixels in width by 1,800 pixels in height and a DPI of 600 for the best picture print quality.
5” x 7” image: These are images typically used for frames. According to an article by Adobe, this should be a 3.5:2.5 aspect ratio on the camera and it will require a little cropping to fit into the frame. While this is better advice for more advanced photographers, for a beginner, I would try the 4:3 aspect ratio and just crop more from the image to make it fit into the frame. Take the photo in both suggested aspect ratios and see which one works better. Picture quality should be 1,500 pixels in width by 2,100 pixels in height with a DPI of 600 for the best picture print quality.
8” x 10” image: This is not a common frame size but it is one for which we see hanging on the walls of homes. This image should be taken in a 5:4 aspect ratio with at least 2,400 pixels in width by 3,000 pixels in height and printed with 600 DPI.
8.5” x 11” image: This is a full size standard printing paper. An aspect ratio of 3:4 would be appropriate, 3,400 pixels in width by 4,400 pixels in height and 600 DPI. These would work best for any type of poster such as the missing animals or event advertisements seen posted or even a larger frame option.
Resizing Images for Social Media
When we speak about image sizes or resizing images for the Internet, we will discuss this in pixels only. The social media websites are constantly changing and updating how they handle images and their image size requirements. We have researched this from quite a few websites to provide as up to date information as possible at the time of writing this tutorial. The one thing we can say is that almost none of the websites researched agree with each other. We believe this is because of older information coupled with the constant changes in the various social media website requirements and the lack of any standardization
Sked Social is a less expensive paid website software that allows for easy management of social media posts. We have not used this software and the mentioning of their software is not a recommendation. We did find the information on their website more credible than others during our research.
The Sked Social Media website has a more up to date article with an extreme amount of testing for resizing images for Twitter and other social media websites. While these sizes definitely do not agree with the official social media website size requirements, considering the extensive research this company has accomplished and the fact that almost 80% of social media marketers are using these sizes, this appears to be the most accurate and beneficial size requirement information. We will provide the highlights within this tutorial but for more detailed information please read the full article found here:
https://skedsocial.com/blog/twitter-post-size-guide
Sked states, according to their research, the following sizes will be optimal for all social media websites and not just twitter. We suggest trying and testing these figures before taking them for fact. These sizes are subject to change as resolutions on monitors and mobile devices change.
Sked's Post Image Size Recommendation
- 1600 x 900 pixels - Recommended
- 1080 x 1080px
- 1080 x 1350px
Twitters Direct Recommendation for Images
- Minimum Image Dimensions Landscape: 1,024 pixels in width by 512 pixels in height
- Recommended Image Dimensions Landscape: 1600 pixels in width by 900 pixels in height
- Image Dimensions Square: 1080 by 1,080 pixels for both height and width
- Image Dimensions Portrait: 1080 pixels in width by 1350 pixels in height
- Desktop Computer Aspect Ratio: 2:1 or 1:1
- Mobile Device Aspect Ratio: 2:1, 3:4, 5:4 or 16:9
- Maximum image size: 5 MB
Twitter Profile Photos
- Dimension: 400 by 400 pixels
- Aspect Ratio: 1:1
- Maximum Image Size: 2 MB
Twitter Header Images
- Dimension: 1500 by 500 pixels
- Aspect Ratio: 3:1
- Maximum Image Size: 5 MB
Twitter Cards
- Recommended Image Size: 4096 x 4096 pixels
- Minimum Image Size: 300 x 157 pixels
- Aspect Ratio: 2:1
- Maximum Image Size: 5 MB
Twitter Ads
https://business.twitter.com/en/help/campaign-setup/creative-ad-specifications.html
- Website Card: 800 x 418 pixels
- App Card Image: 800 x 800 pixels
- Carousels: 800 x 800 pixels
- Direct Message Card: 800 x 418 pixels
- Conversation Card: 800 x 418 pixels
- Video Ads:
- 1200 x 1200 pixels (for a 1:1 aspect ratio)
- 1920 x 1080 pixels (for a 16:9 ratio)
Twitter Video Aspect Ratios
- 16:9
- 4:3
- 1:1
Twitter Post Video Resolution:
1080 x 720 pixels
Maximum Twitter Video Length:
2 minutes 20 seconds
Image File Type and Sizes
- JPEG, JPG, PNG (Transparency)
- Do not use BMP or TIFF file formats.
- GIF:
- Resolution: 1280x1080.
- Maximum Number of Frames: 350
- Maximum File Size: 15MB
Video Information
- Twitter Mobile App File Type: MP4 and MOV
- Internet File Type: MP4 with H264 format with AAC LC audio on the Internet
- Maximum Video File Size: 512MB
- Maximum Frame Rate: 60 FPS
Stretching and Skewing
What is stretching or skewing an image?
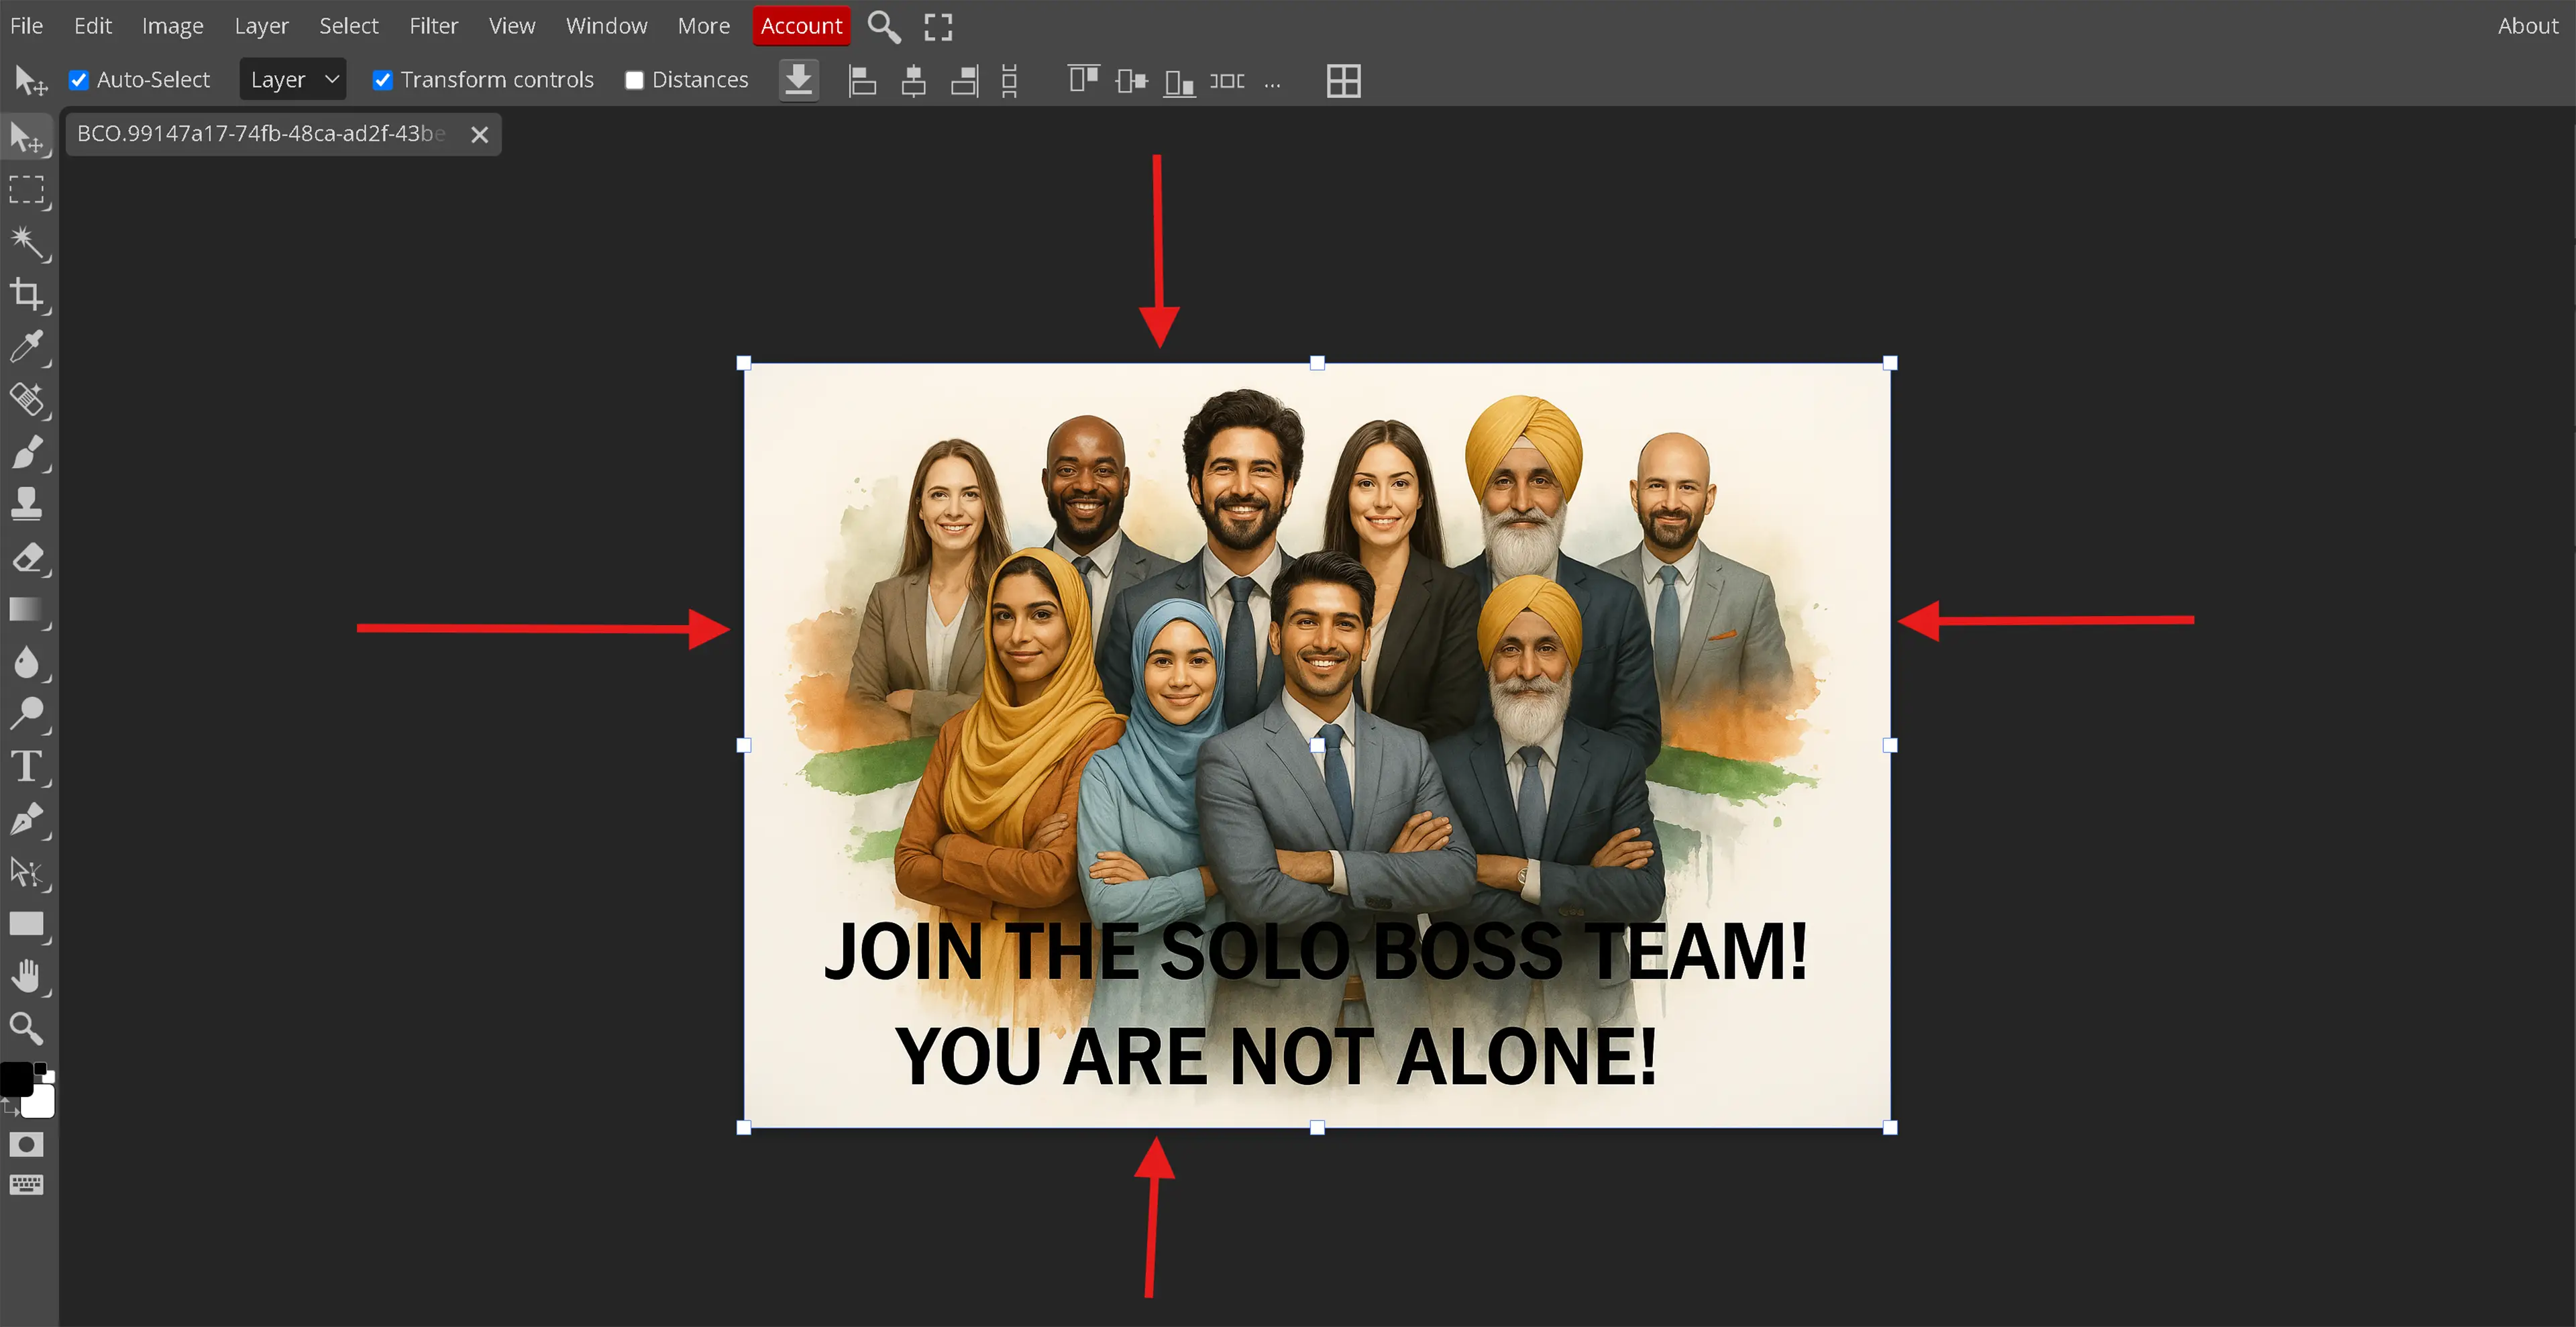
Stretching: Refers to increasing the length or width of an image layer without affecting the opposite. For example, if our desire is to increase the length of the image, in Photopea, we can:
- Select the Move tool.
- Check the checkbox transform controls to show the 8 outer edge squares or control points around the image layer.
- Hold down the shift key on the keyboard.
- Now click and hold the left mouse button down on either of the left or right control points and drag your mouse left or right. The image will now increase or decrease in width depending on the mouse movement.
If the desire is to increase or decrease the height of the image layer then we use the top or bottom control points instead of the left or right.
Skewing: Refers to changing the shape of the image layer. We follow the same instructions as shown in “Stretching” to display the control points but instead of holding the Shift Key, we hold the Control or Command key. Now we can click on any of the control points and move the image layer around into different shapes.
Stretching and skewing an image is another form or image resizing. This does not change the canvas size but does resize the image layer within the canvas.