What is a Layer?
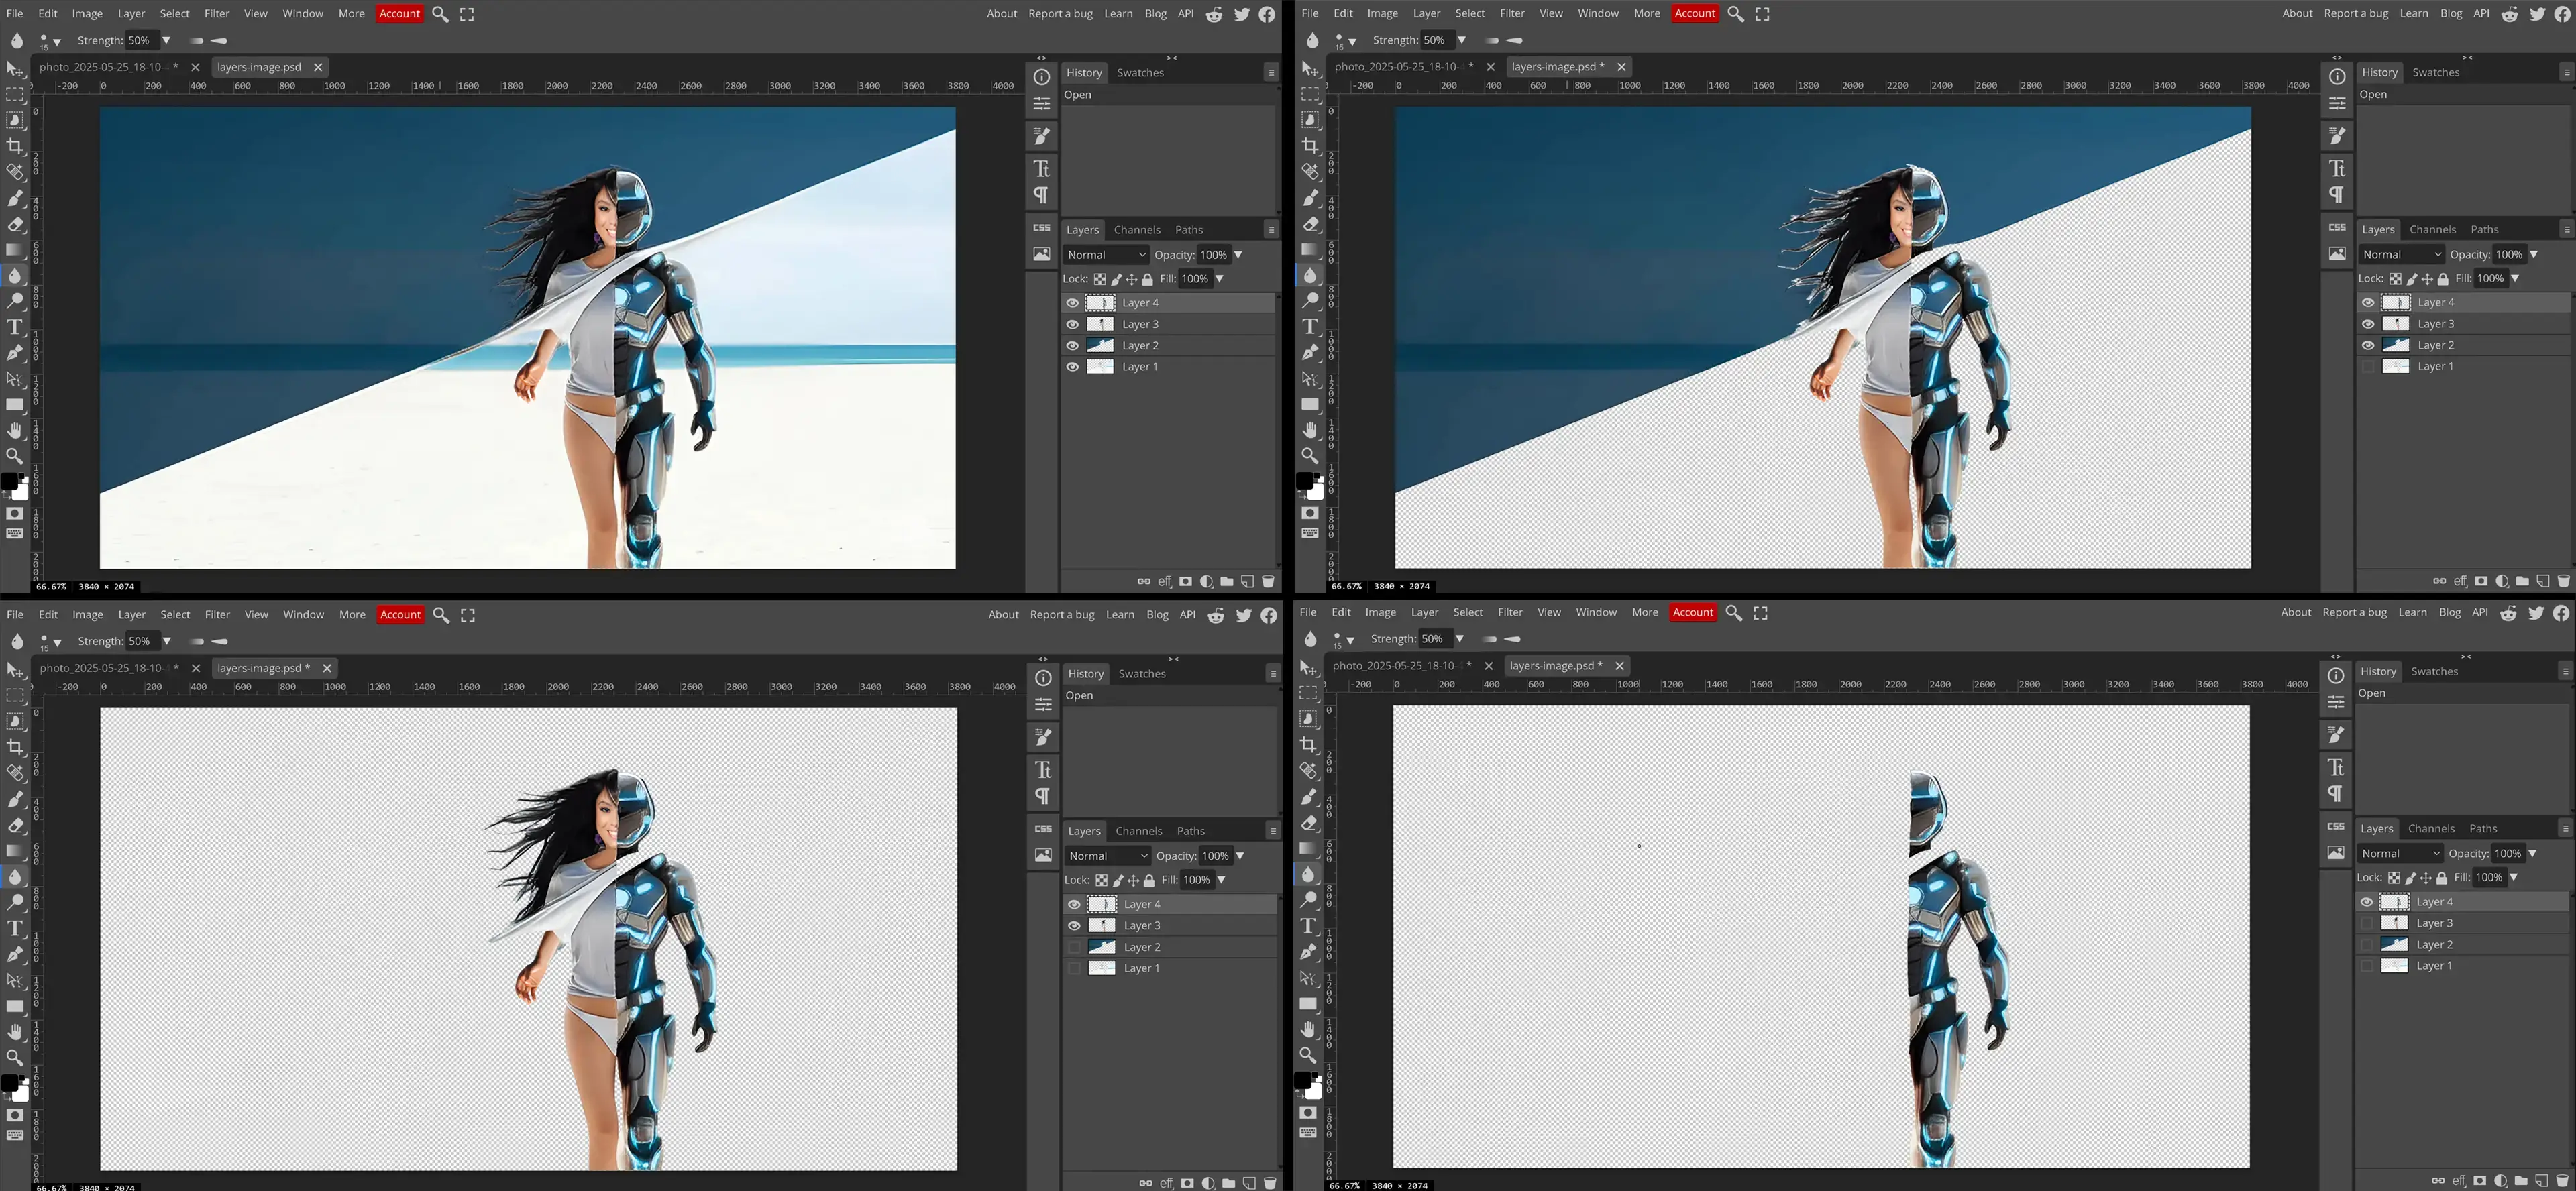
When working with images in an editing program, layers function as individual elements stacked on top of each other, allowing different parts of an image to be edited independently. A layer can contain images, text, colors, or effects, making it an essential tool for organizing and manipulating image compositions.
Layers provide an organized way to edit images by keeping different elements separate. For example, text, images, and effects can exist on their own layers, making adjustments easier without affecting other parts of the composition. This structure is essential for professional editing workflows, allowing for flexibility and creative control when working with photo layers.
One of the key benefits of using layers is non-destructive editing. Instead of making direct changes to the base image, edits are applied to separate layers, which can be adjusted, hidden, or removed at any time. This means effects, filters, and color adjustments can be modified without permanently altering the original image. By understanding how to use layers effectively, editors can work efficiently and make precise adjustments.
Layers also allow for advanced compositing techniques, such as blending multiple images, adding shadows, and applying masks. Whether creating a simple graphic or a detailed digital artwork, working with layer images is a fundamental skill for any photo editor.
Layers Panel
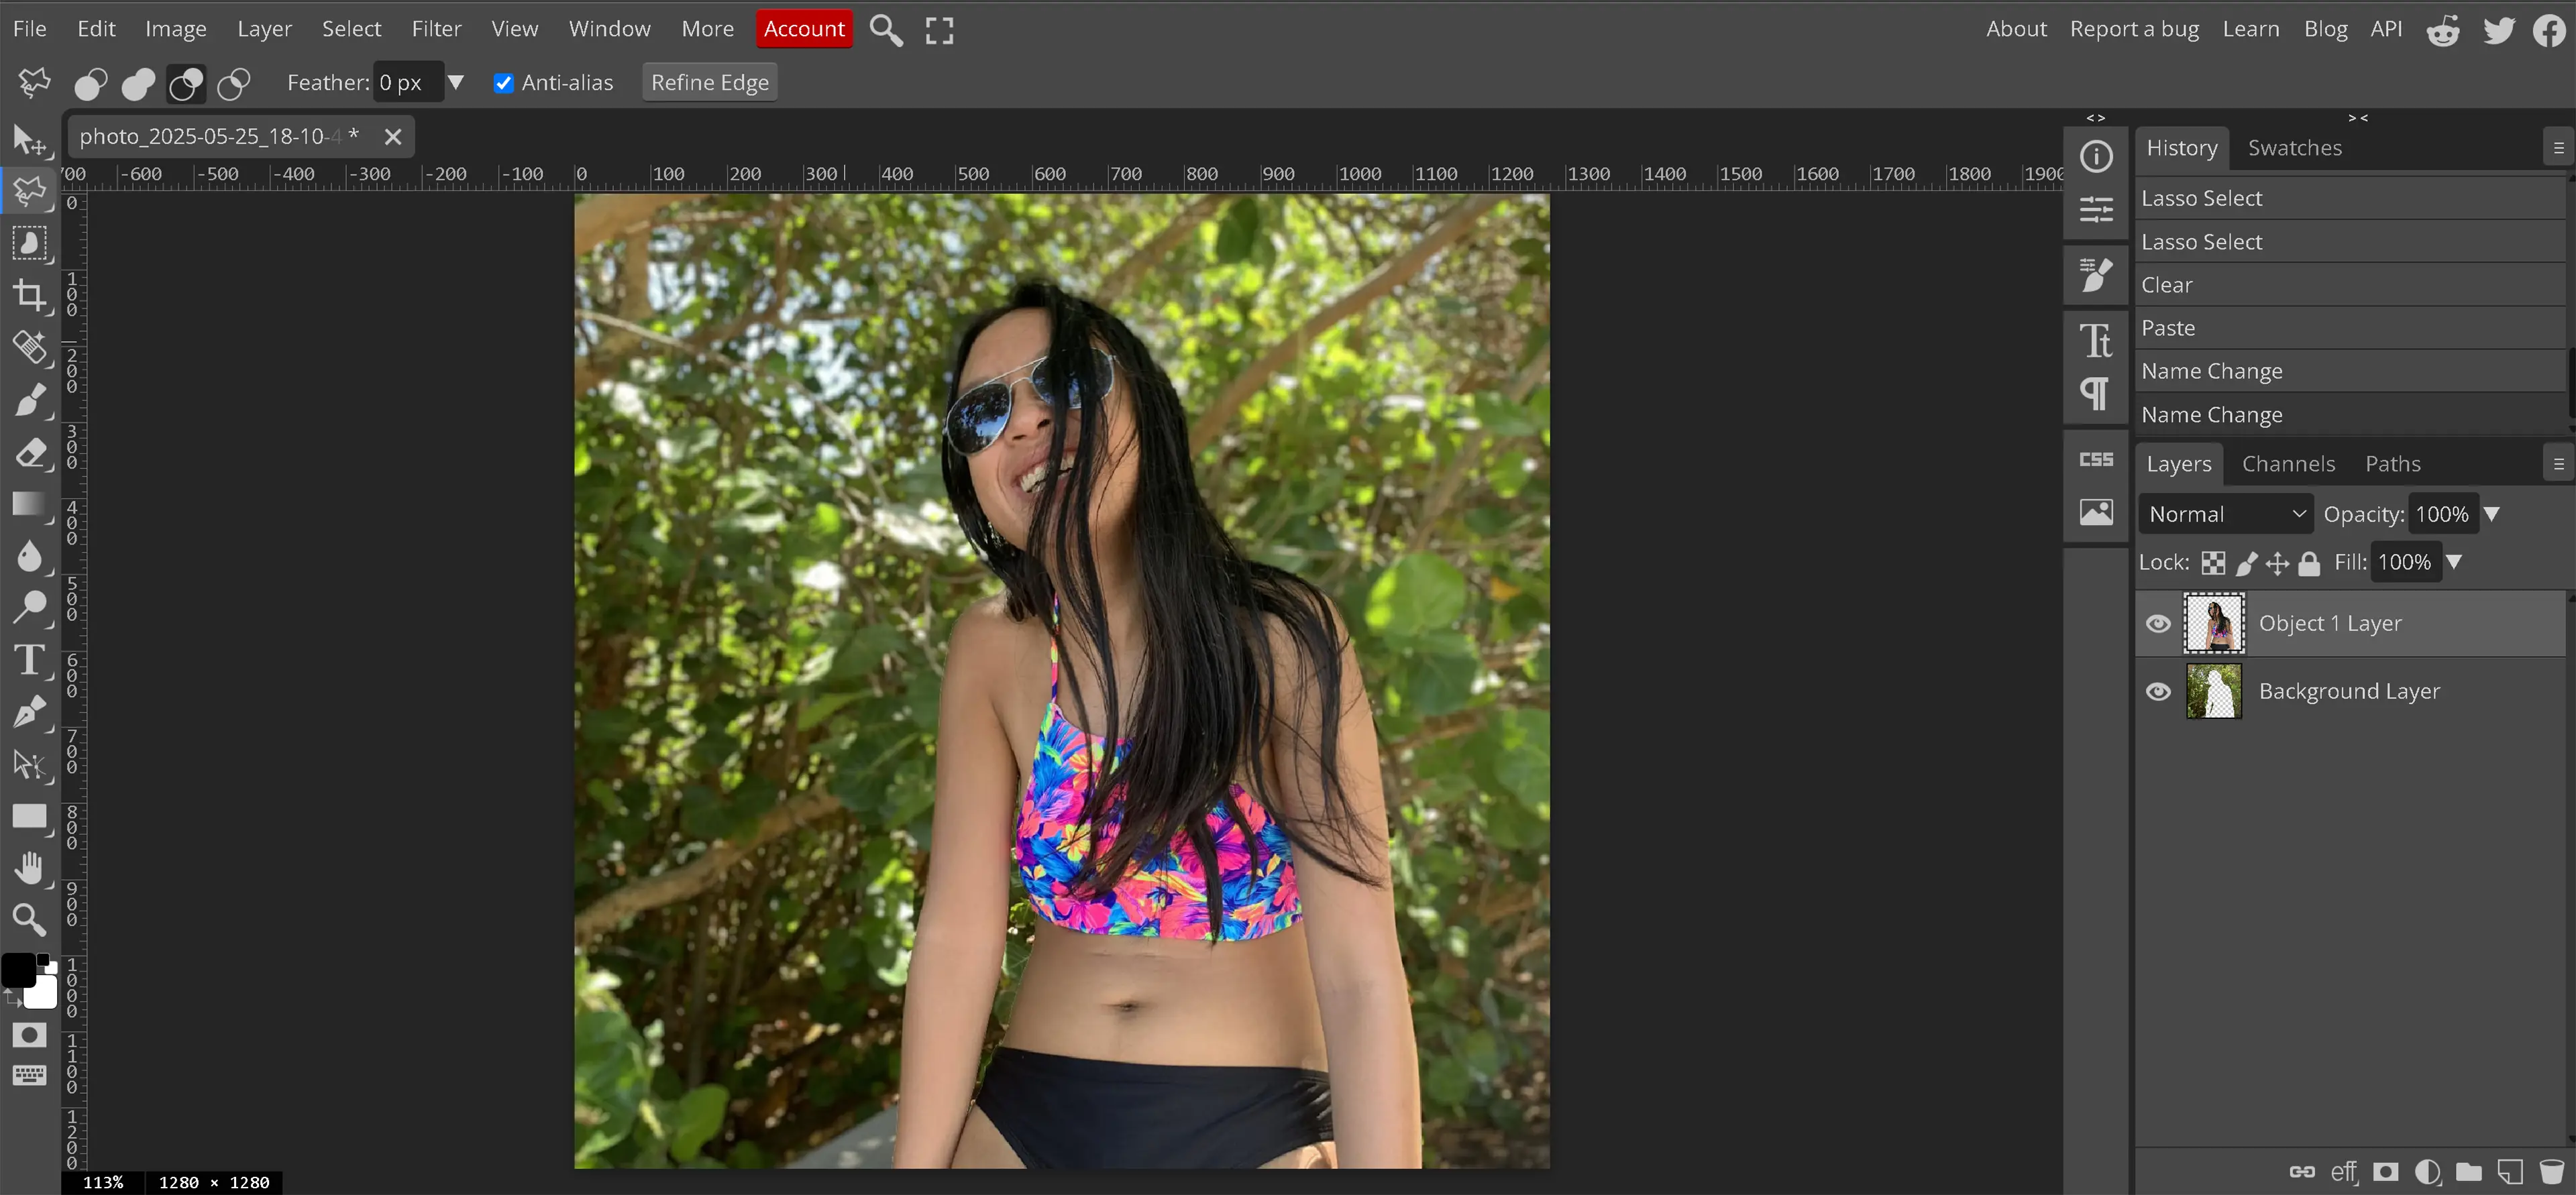
The Layers panel is the primary workspace in Photopea for managing and organizing photo layers. It visually displays each layer in a stacked layout. The way the layers are arranged in the Layers panel directly reflects how they appear on the canvas. The bottom-most layer in the Layers panel will be at the bottom of the canvas, while the top-most layer will be seen at the top of the canvas. Understanding how to navigate and use the Layers panel is essential for building, editing, and maintaining organized compositions.
Each layer is represented with a thumbnail preview, which provides a quick look at its contents. To the left of the thumbnail is the eye icon, which toggles layer visibility. Clicking the eye will hide or show the layer on the canvas, which is especially useful when working with complex compositions or when needing to isolate a specific element.
When a layer is selected, the top of the Layers panel displays additional options, including Opacity and Blending Modes.
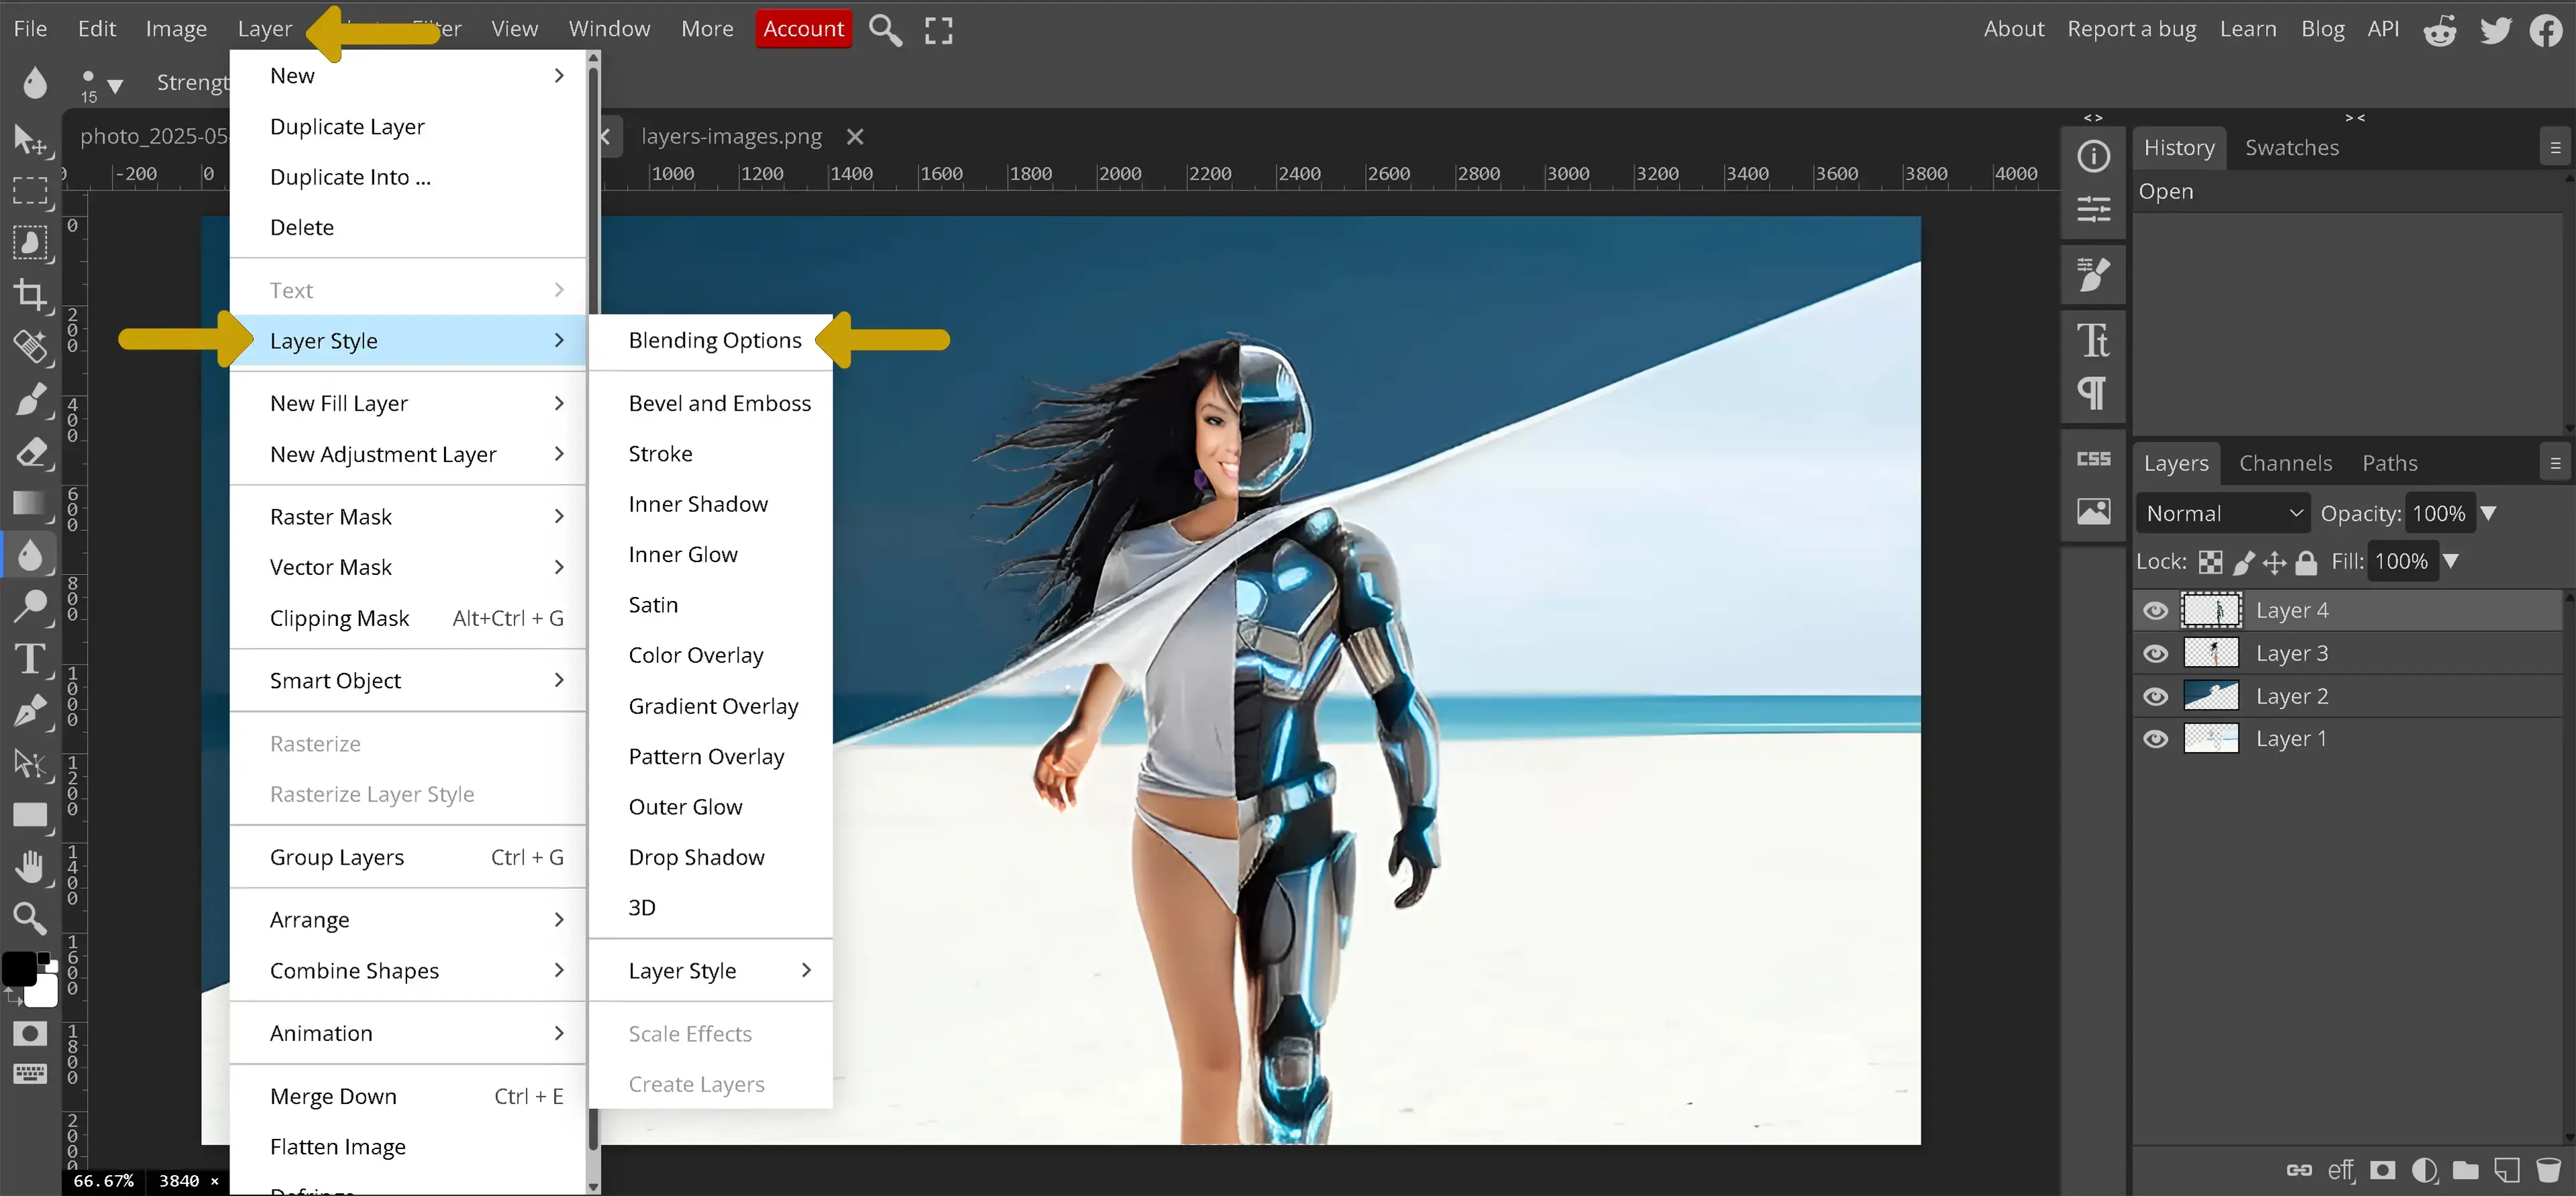
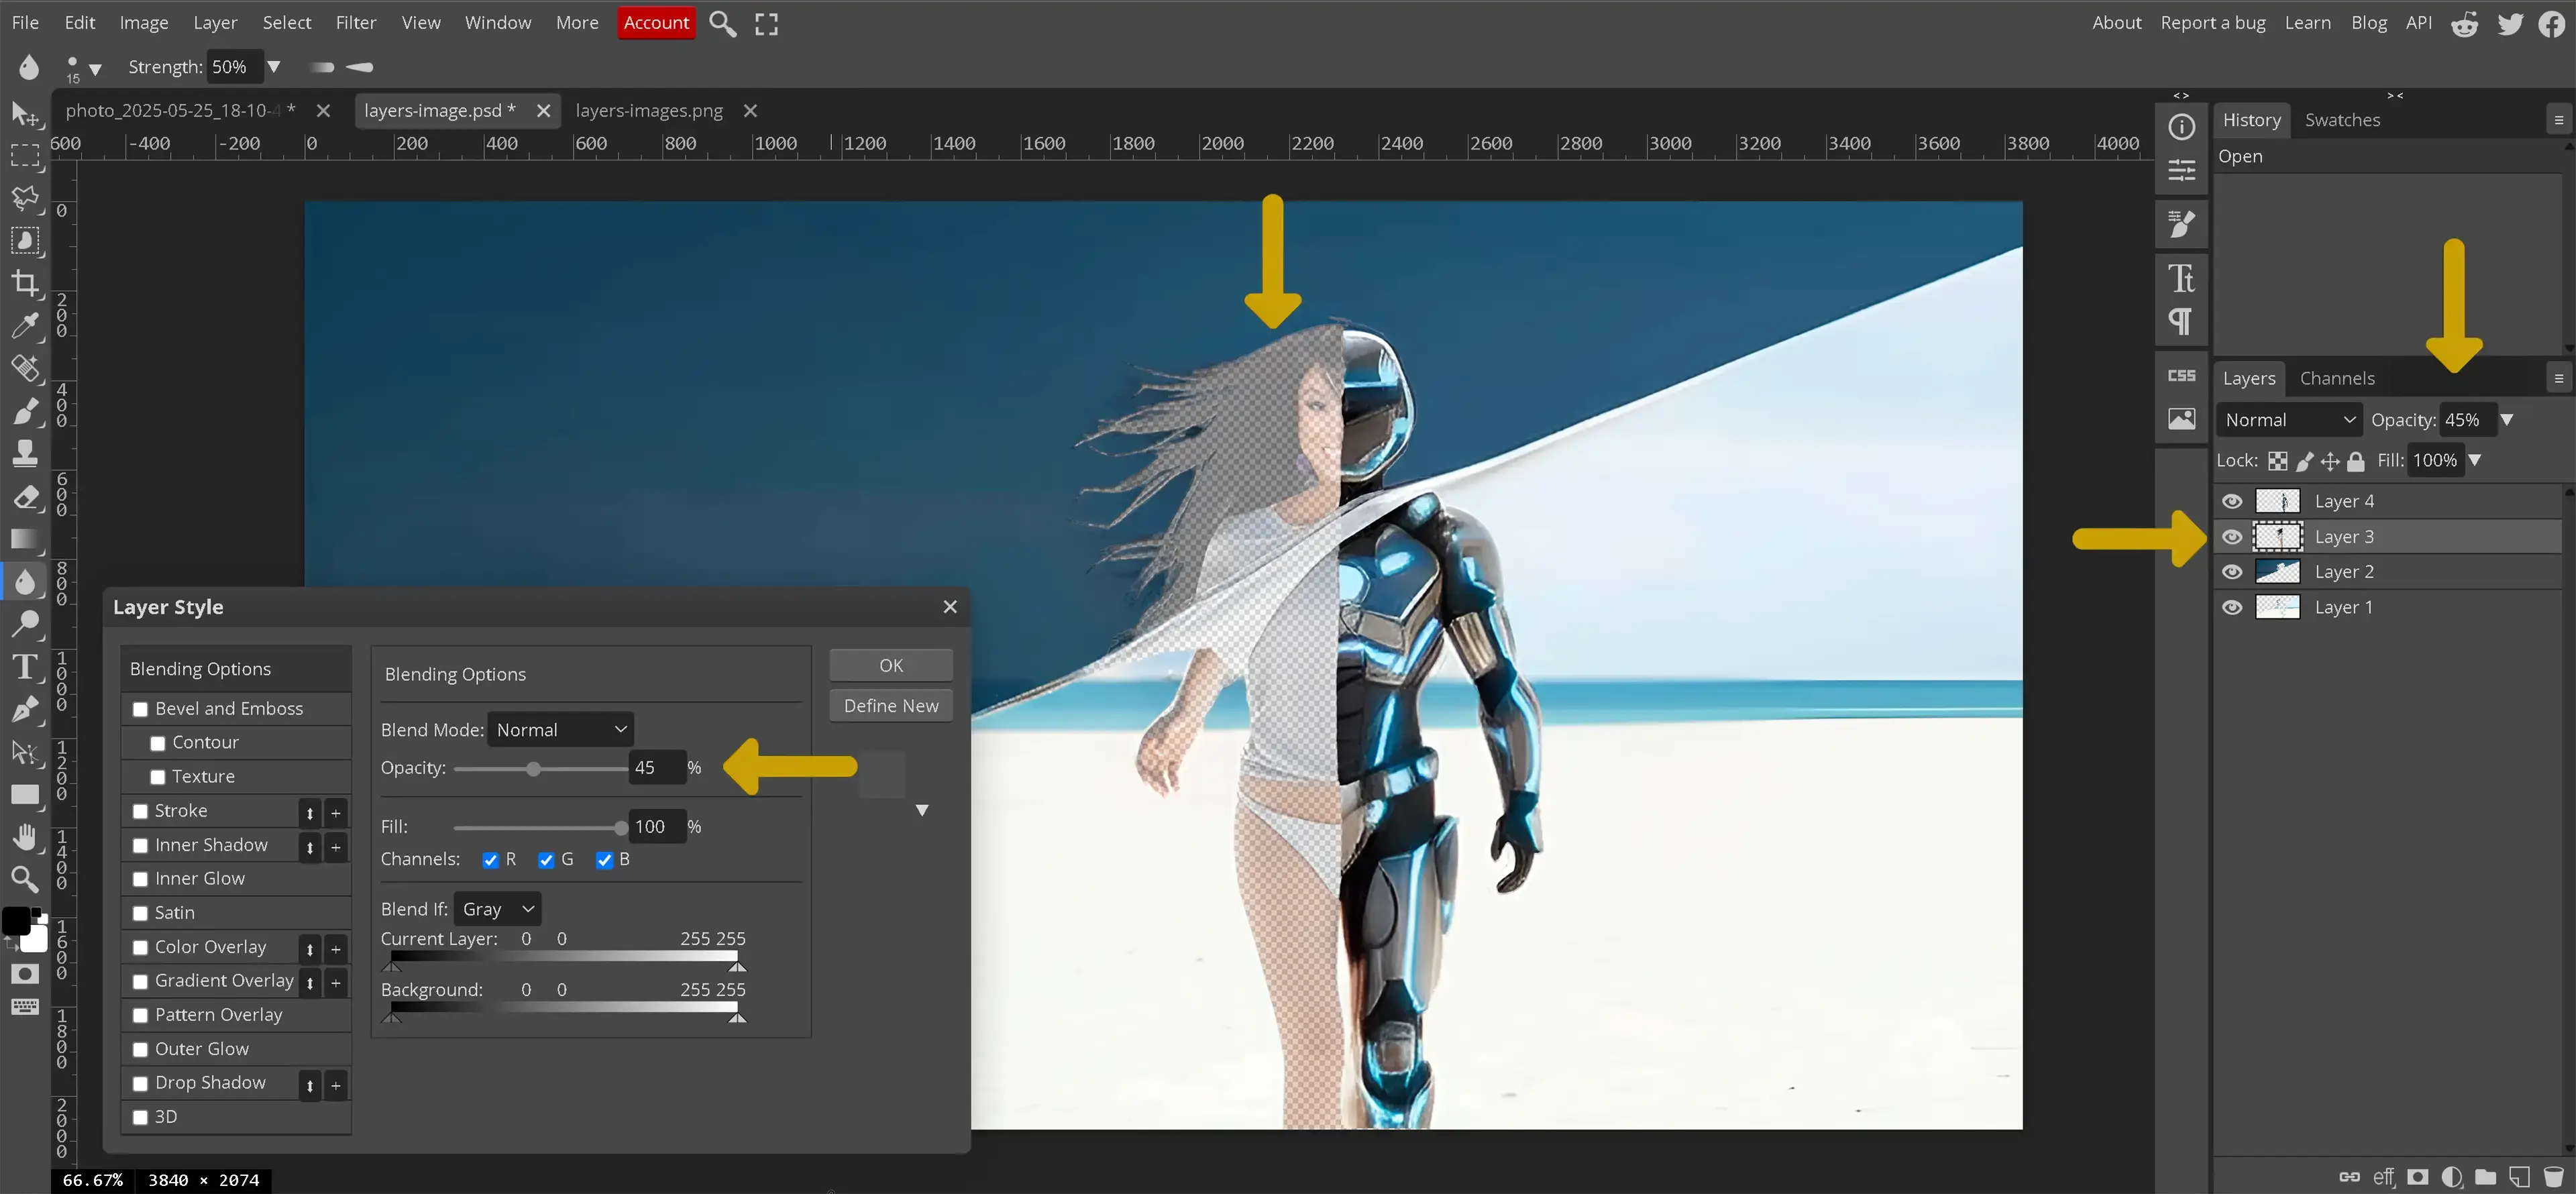
- Opacity controls how transparent a layer is. A layer set to 100% opacity is fully visible, while 0% makes it invisible. There are two areas that control opacity; the layer style menu and the layers panel. Both do the same thing, but the layer style panel has many more options.
- Blending Modes determine how the layer interacts visually with the layers below it. For example, Multiply will darken the layer based on the content beneath it, while Screen will lighten it.
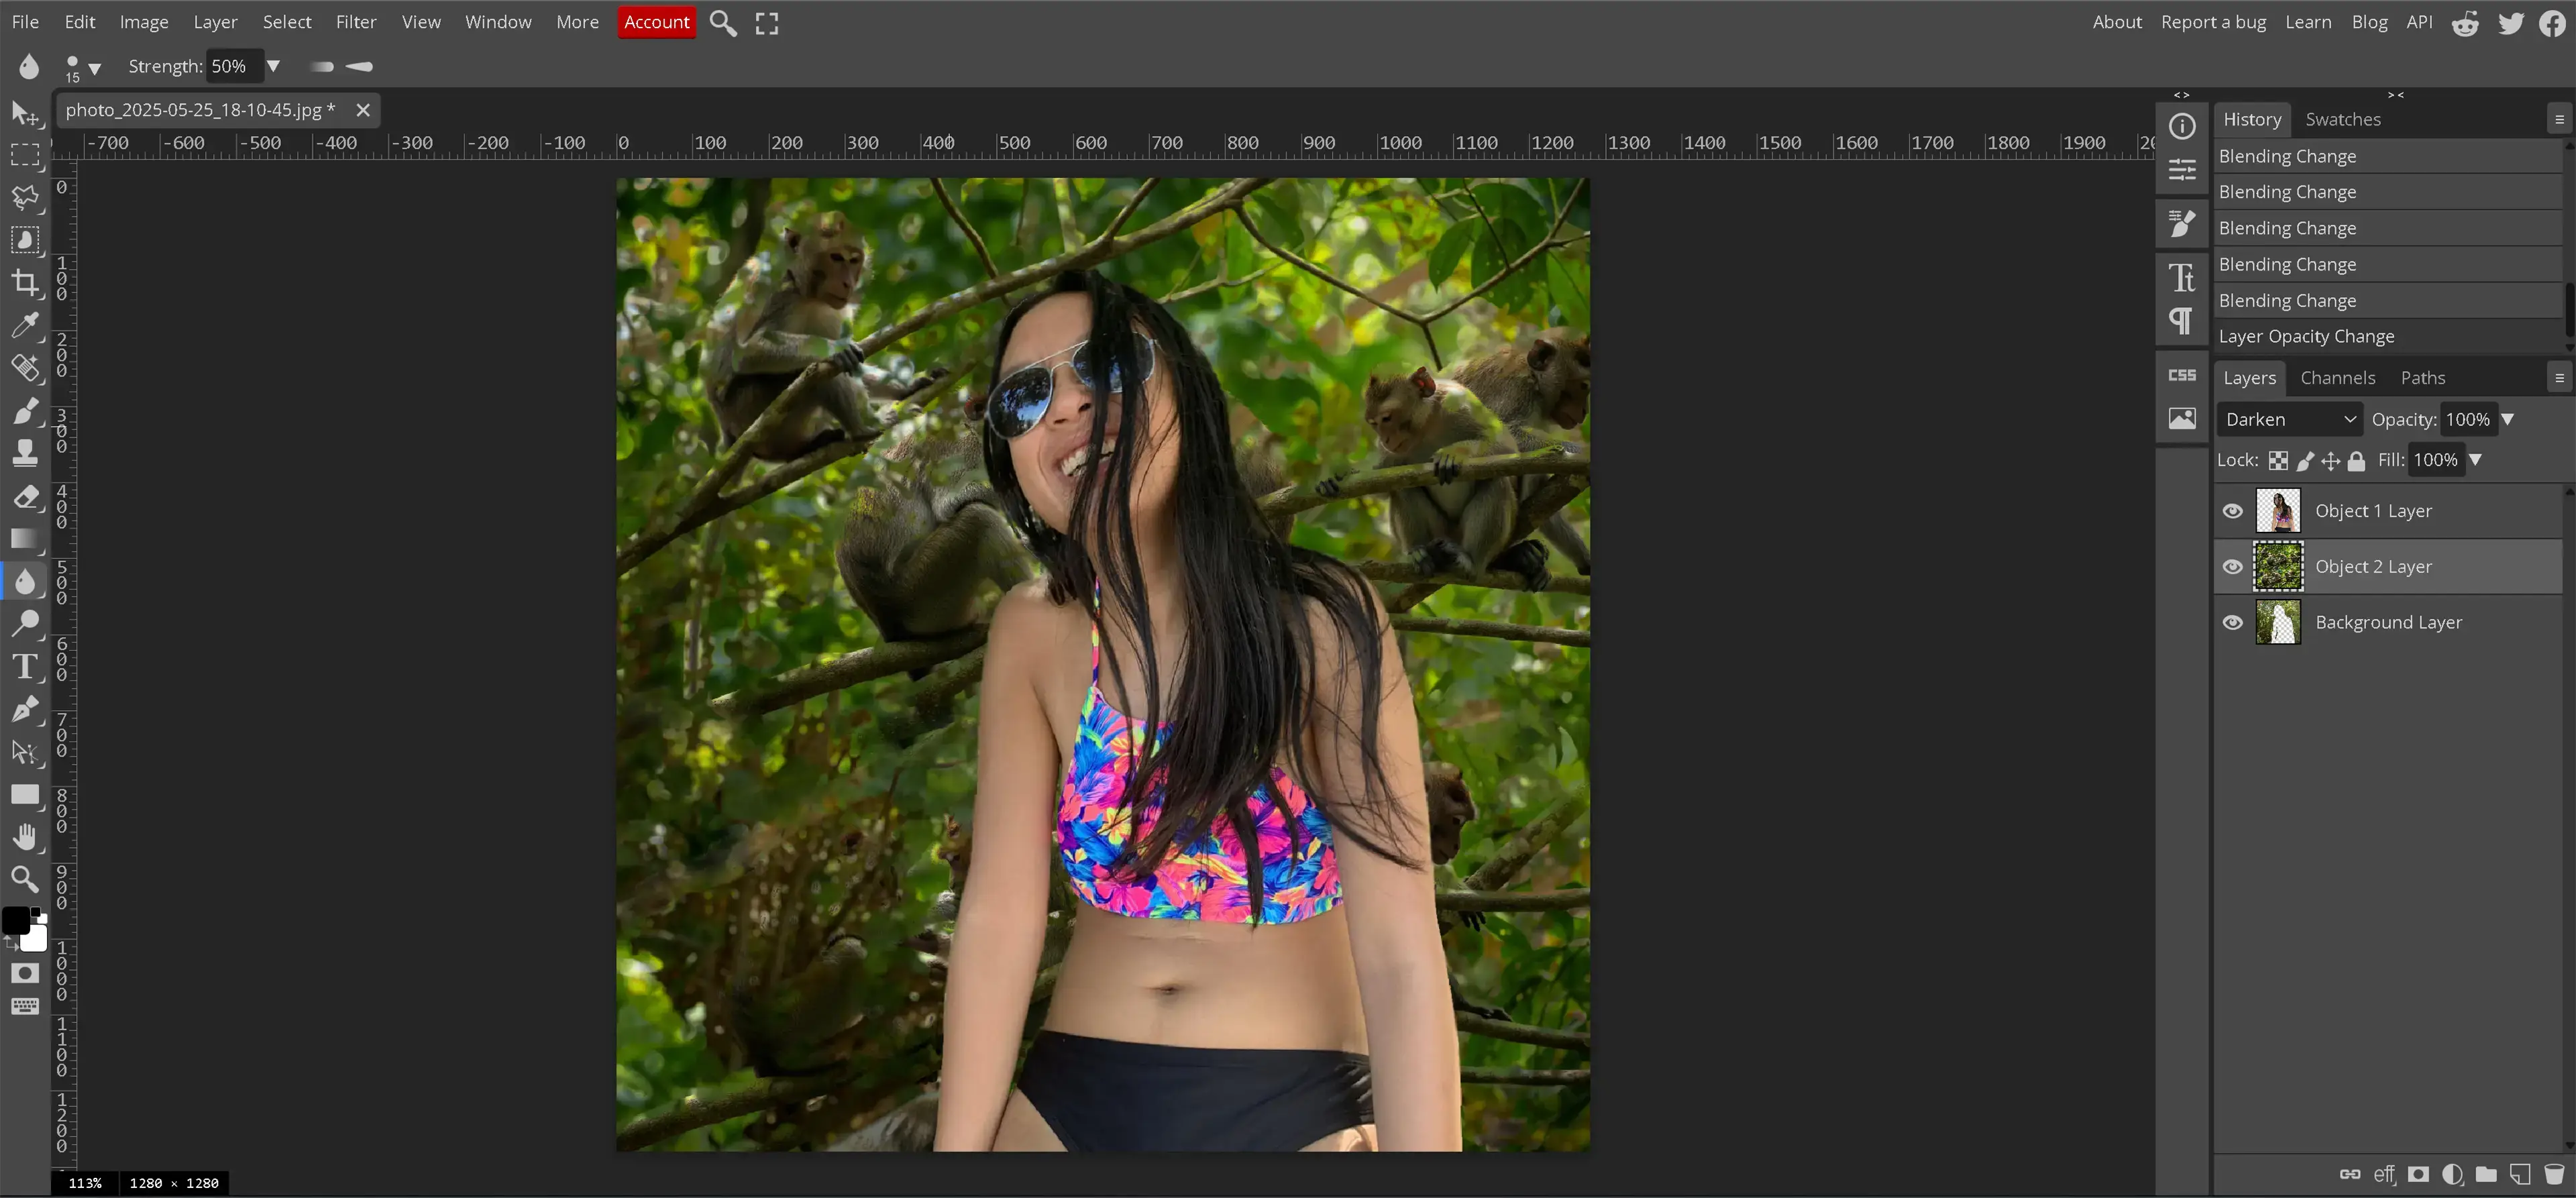
You can rearrange layers by clicking and dragging them up or down in the stack. You can also rename a layer by double-clicking its name, which helps when organizing multiple elements.
Located along the bottom of the Layers panel are several useful icons that perform key layer-related functions:
- Link Layers: Links two or more selected layers so they move and transform together as a unit.
- Layer Style: Opens a style editor where you can apply effects like drop shadows, strokes, glows, and more.
- Add Raster Mask: Adds a layer mask to the selected layer, allowing for non-destructive visibility adjustments.
- New Adjustment Layer: Adds a non-destructive effect layer like brightness, hue/saturation, or color balance.
- New Folder: Creates a new layer group for organizing layers into collapsible folders.
- New Layer: Adds a blank new layer above the currently selected one.
- Delete: Removes the selected layer or group from the stack.
The Layers panel is also where you'll access layer locks. These include:
- Lock Transparency: Prevents changes to the transparent parts of a layer.
- Lock Pixels (Brush Icon): Disables painting or editing on the layer's pixels.
- Lock Position (Crosshair): Prevents the layer from being moved.
- Full Lock: Locks everything on the layer, making it uneditable and unmovable.
Mastering the Layers panel is essential when working with photo layers and layer images. It gives editors full control over each component of their project and supports a non-destructive, organized editing workflow.
How Do I Merge Two Layers?
Before merging layers, the Layers panel must be open to view and manage all layers within an image. If the Layers panel is not visible, open it using the following method:
- Click Window in the menu bar and select Layers. This will reopen the Layers panel if it was previously closed using the <> icons at the top of the Layers panel.
Merging layers in Photopea combines their contents into a single layer. This process is useful for simplifying the layer stack, reducing file size, and applying effects that require multiple layers to be treated as one. Understanding when to merge layers and when to keep them separate is an important part of working efficiently with photo layers.
To select multiple layers within an image to merge:
- Open the Layers panel to view the available layers.
- Hold down Ctrl (Cmd on Mac) and click one time on each layer that should be merged.
- Release the Ctrl (Cmd) key and now right-click on one of the selected layers. A context menu will appear. Choose Merge Layers from the context menu.
An alternative method is using the Ctrl + E (Cmd + E on Mac) shortcut, which merges the selected layer into the layer directly below it.
Merging layers is a destructive process, meaning the original layers are permanently combined. Once merged, the individual layers cannot be separated again unless the action is immediately undone. Because of this, it is best to duplicate important layers before merging them to preserve the ability to make adjustments later.
Merging layers can also help when applying certain effects. Some filters and adjustments require a single layer to work properly. By merging, the effect can be applied uniformly across the selected elements. However, in cases where non-destructive editing is preferred, grouping layers instead of merging may be a better option.
It is also important to note that merging layers affects transparency. If one of the layers has transparent areas, the merged result will maintain those transparent sections. However, if the layers contain blending modes or opacity adjustments, the final merged layer may appear slightly different from the original layers. Checking the results after merging ensures that the composition remains intact.
Differences Between a Layered Image and a Flattened Image

A layered image contains multiple layers, allowing for independent editing and manipulation of different elements. In contrast, a flattened image merges all layers into a single background layer, making it simpler and smaller in file size. Understanding the differences between these two types of images is essential when choosing the appropriate format for different projects.
Layered images provide greater flexibility because each element remains on its own layer. This allows adjustments to be made without permanently altering other parts of the composition. For example, when working with photo layers, a text layer can be edited without affecting the background image, or an adjustment layer can be modified without changing the original image data. This non-destructive editing process is beneficial for ongoing projects or when multiple revisions are expected.
Layered files are ideal for projects that require constant changes or have multiple design elements. For example, when designing a business card, this project will require several non-destructive layers including the logo, text, and background color. In contrast, a final banner for a website that has already been approved might only require a single, flattened layer for fast loading and simple exporting.
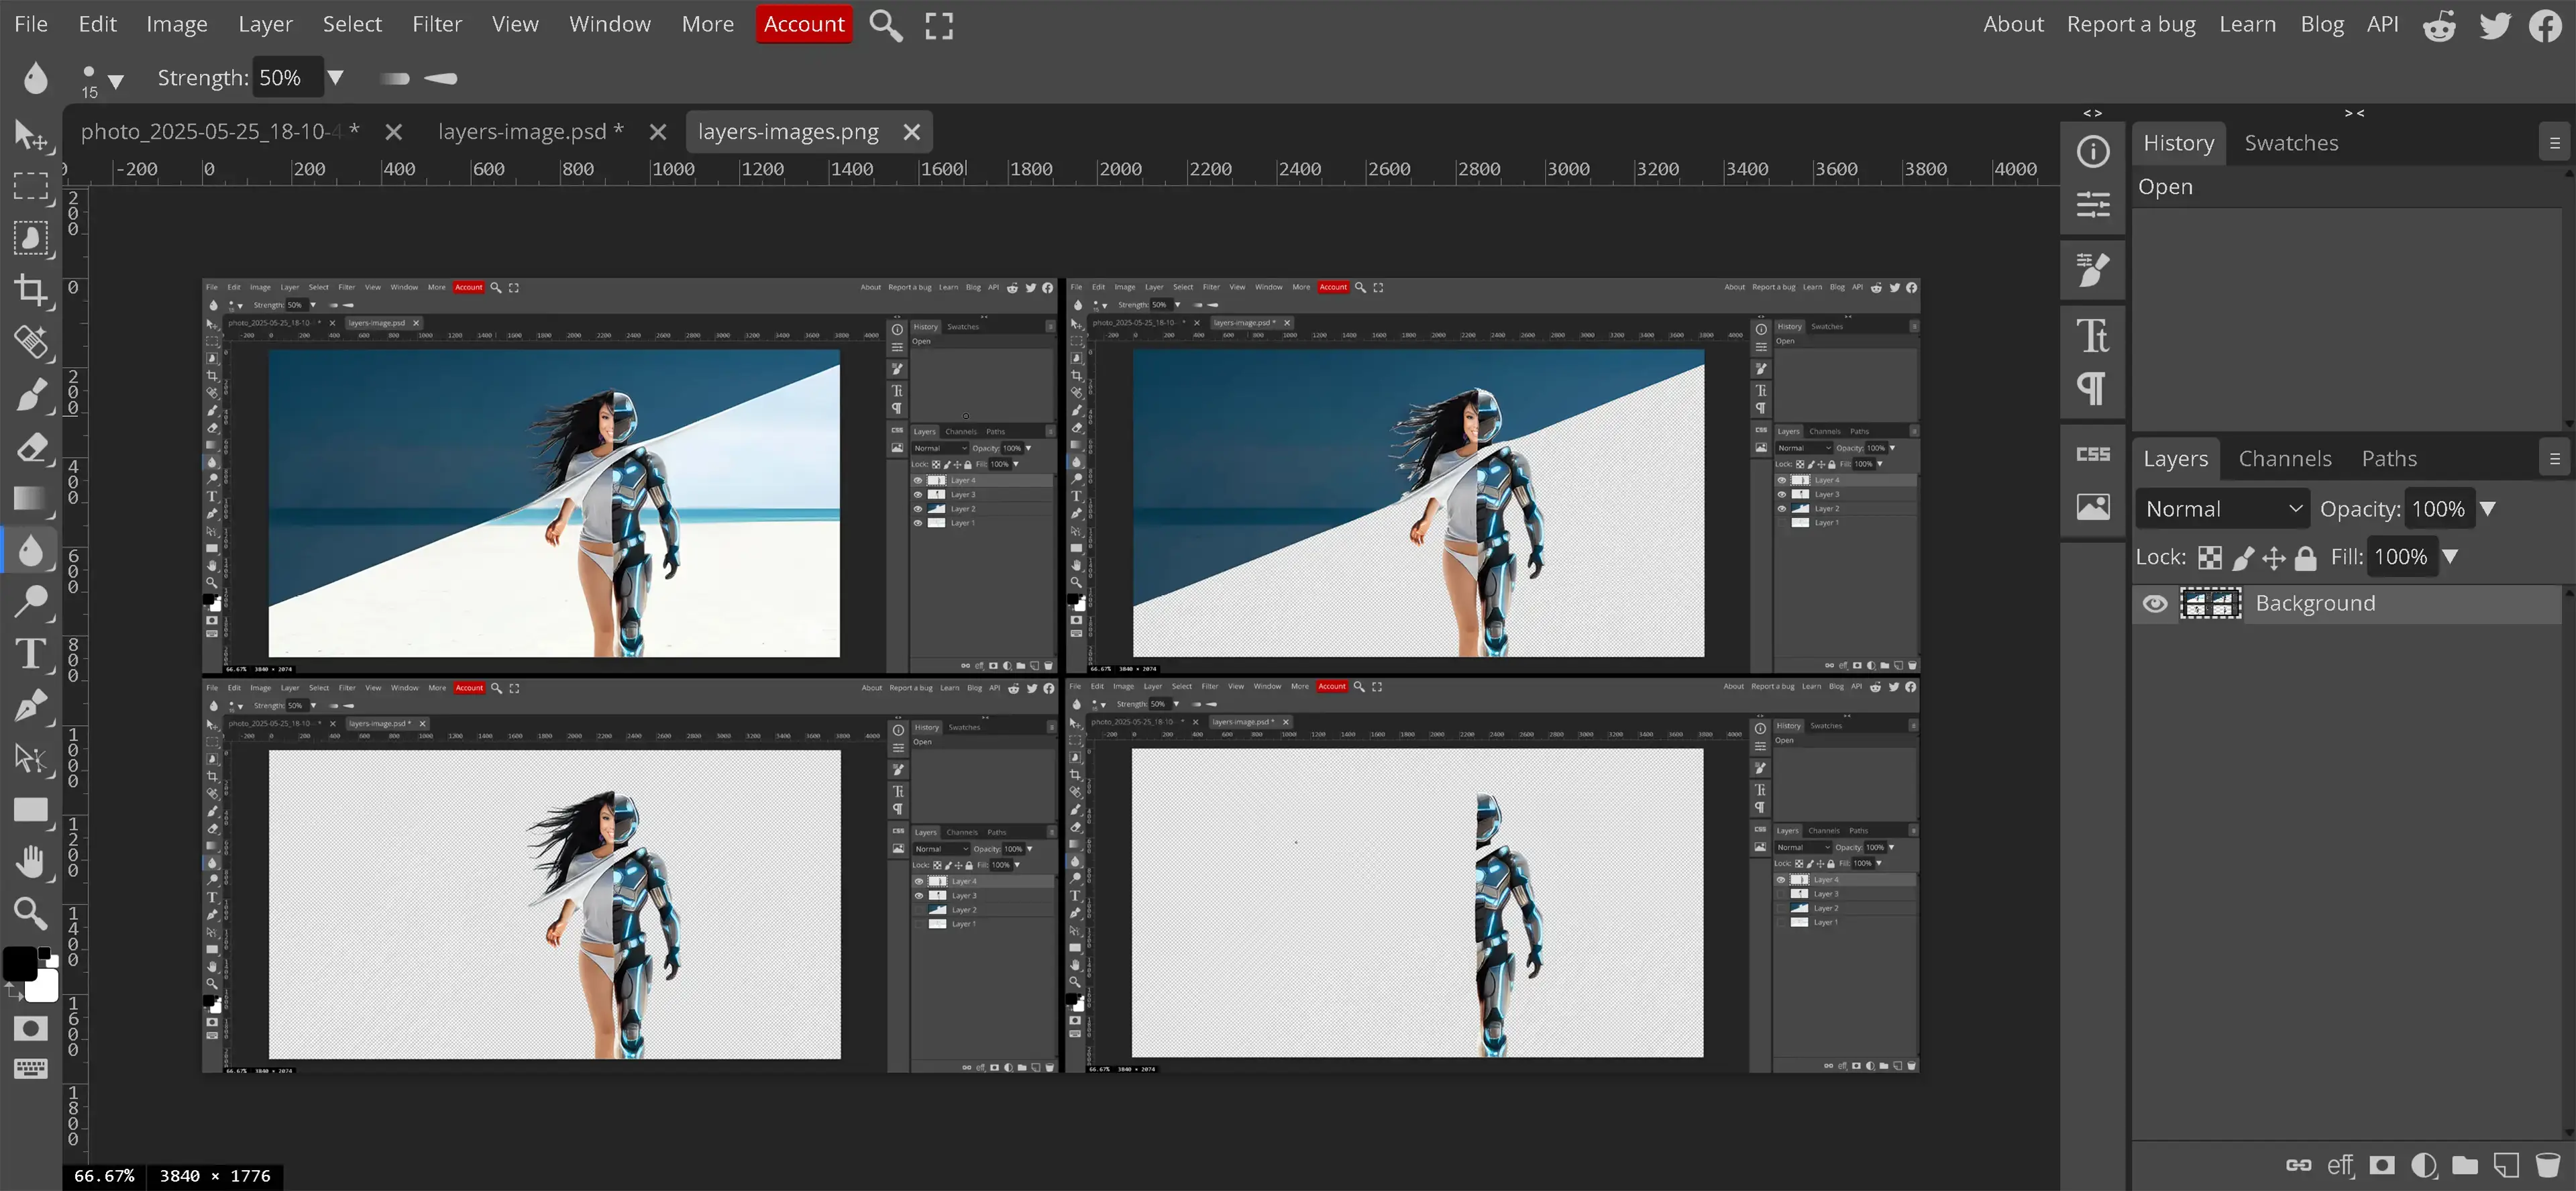
Flattened images are best used for final outputs. They reduce file size and are compatible with a wider range of applications, including web use and printing. However, once an image is flattened, all layers are permanently merged, meaning individual elements can no longer be edited separately. This makes it crucial to save a copy of the layered image before flattening it.
Flattening an image is a destructive process, meaning that the layers are permanently combined. If additional edits are needed after flattening, they must be applied to the entire image rather than individual layers. To flatten an image in Photopea, select Layer from the menu and then select Flatten Image. Before doing so, ensure that a copy of the layered file is saved in case further adjustments are needed.
Layered images are typically larger in file size because they contain more data, such as layer masks, blending modes, and adjustment layers. Flattened images, in comparison, contain only the final merged composition, making them easier to export and share across the Internet. Choosing between a layered image and a flattened image depends on the needs of the project, whether further editing is required or if the image is ready for final use.
Keyboard Shortcuts
Keyboard shortcuts can significantly speed up the editing workflow in Photopea, especially when working with multiple photo layers. Instead of relying solely on menu options, shortcuts allow quick access to commonly used functions. This saves time, reduces repetitive clicking, and helps maintain focus on the editing process.
Below are several useful keyboard shortcuts for managing photo layers and improving overall efficiency:
-
Ctrl + J (Cmd + J on Mac): Duplicate the currently selected layer.
Example: Use this before applying effects to preserve the original layer. -
Ctrl + Shift + E (Cmd + Shift + E on Mac): Merge all visible layers into one.
Example: Useful when preparing the final version of an image for export. -
Ctrl + Alt + Shift + E (Cmd + Option + Shift + E on Mac): Merge all visible layers into a new layer while keeping the originals intact.
Example: Ideal for applying an effect to a composite version of the image without flattening anything. - Ctrl + G (Cmd + G on Mac): Group selected layers together.
Example: Great for organizing multiple elements, like icons or grouped text. - Ctrl + Shift + G (Cmd + Shift + G on Mac): Ungroup the selected layer group.
-
Ctrl + Z (Cmd + Z on Mac): Undo the last action.
Example: Essential when making quick corrections after a mistake. - Ctrl + Shift + Z (Cmd + Shift + Z on Mac): Redo the last undone action.
Example: Helpful when reviewing changes and reapplying them as needed.
These shortcuts help make working with layer images more efficient, particularly during tasks like organizing, duplicating, or combining elements. They also provide a way to navigate mistakes quickly, which is important when experimenting or working under time pressure.
While these are some of the most common shortcuts used when working with layers, Photopea allows users to customize many shortcuts to suit individual workflows. Taking the time to learn and apply these shortcuts can improve speed and accuracy while working with photo layers.
Grouping Layers
Grouping layers in Photopea allows editors to keep their layer stack organized, especially in complex projects. A group acts like a folder that contains multiple layers, enabling users to collapse and expand its contents without affecting other parts of the composition. When working with photo layers, grouping is useful for managing related items such as icons, labels, or layered effects.
To create a group:
- Open the Layers panel.
- Hold down Ctrl (Cmd on Mac) and click one time on each layer to include in the group.
- Release the Ctrl (Cmd) key, now right-click on one of the selected layers, and choose Group Layers from the context menu.
Grouped layers can be moved together as one unit. For example, grouping all text layers on a flyer allows repositioning the text block without selecting each layer individually. Grouping is also helpful when applying transformations or alignment adjustments to several layers at once.
To ungroup layers:
- Right-click on the group folder in the Layers panel and choose Ungroup Layers. The individual layers will return to the main stack.
Groups can also be nested, meaning one group can be placed inside another. This is particularly helpful when working with large compositions or repeating structures. For example, in a website mockup, each section (header, footer, sidebar) might be its own group nested inside a master layout group.
Grouping layers doesn't merge or flatten them—it simply organizes them visually and functionally. It's a useful method for improving workflow when working with complex layer images.
Working with the Background Layer
The background layer is the base layer in most Photopea documents and is typically locked by default. When a layer is locked, it cannot be moved or edited until it is unlocked. Knowing how to work with the background layer is an essential part of mastering photo layers.
To unlock the background layer in Photopea:
- Open the Layers panel.
- Locate the lock icon to the right of the background layer.
- Click the lock icon. The lock will disappear, and the background layer will now be editable.
Once unlocked, the background layer becomes a standard layer and can be edited like any other. This includes moving it, transforming its size, applying effects, and adjusting its opacity. Unlocking the background is helpful when replacing or modifying the original background content.
To lock the layer again, click the lock icon in the Lock section at the top of the Layers panel. In addition to the main lock, there are three other icons in this section:
- A checkerboard icon for locking transparency, preventing changes to transparent areas of the layer.
- A brush icon for locking pixel editing, which disables painting or pixel-based edits.
- A crosshair icon for locking the position of the layer, which stops it from being moved accidentally.
The background layer always remains at the bottom of the layer stack. Any layers above it will appear in front of it on the canvas. Whether it's used for solid color, texture, or a photo, the background forms the foundation of any layered composition.
Using Layer Masks
Layer masks are a powerful feature in Photopea that allow for non-destructive editing. They enable you to control the visibility of specific areas within a layer without permanently deleting any content. This is especially helpful when working with photo layers, as you can hide or reveal elements as needed and make changes later without affecting the original image.
To add a layer mask in Photopea:
- Select the layer you want to mask.
- Click the Add Raster Mask icon at the bottom of the Layers panel. A white thumbnail will appear next to the layer's image thumbnail.
White on a layer mask reveals the content, while black hides it. Painting with black will hide areas of the layer, and painting with white will reveal them again. Gray values create partial transparency. This provides a flexible and reversible way to blend layers, remove parts of a layer, or shape how different elements interact.
Using a soft brush on a layer mask allows for smooth transitions and feathered edges between visible and hidden parts. This is especially useful when blending images or isolating objects. Because the mask exists separately from the image, changes can be made at any time without damaging the original content.
Layer masks are essential when creating layer images that require subtle blending, composite images, or background removal. They give editors the freedom to experiment with different edits and visual effects without committing to permanent changes. Mastering layer masks is a foundational step toward professional-level image editing and is covered in more detail in our Advanced Photopea tutorials.
Layer Tips and Tricks
Once you understand the basics of working with photo layers, there are several small techniques and habits that can improve your editing speed and precision. These tips aren't required to complete a project, but they can make the experience smoother and help you work more efficiently as your projects grow in complexity.
-
Hide Layers Temporarily for Focus
Click the eye icon next to a layer to hide it from the canvas. This is especially helpful when working in a crowded layer stack and you want to isolate or test one element at a time.
-
Use Auto-Select for Faster Layer Targeting
When the Move Tool is selected, check the “Auto-Select” box in the top toolbar. This allows you to click directly on an object in the canvas and automatically select its corresponding layer. This saves time when identifying and selecting elements.
-
Name Your Layers Clearly
Double-click a layer's name in the Layers panel to rename it. Naming layers like “Logo,” “Main Text,” or “Background Blur” helps prevent confusion, especially in complex compositions or collaborative projects.
-
Double-Click the Layer Icon for Layer Style
To open the Layer Style options, double-click the blank area next to the layer's name and thumbnail (but not the name itself). This opens the Layer Style window, where you can apply effects such as shadows, strokes, inner and outer glows, bevels, and more. All of these changes are applied non-destructively.
-
Right-Click for Quick Layer Options
Right-clicking on a layer brings up a context menu with options like Duplicate Layer, Convert to Smart Object, Merge Layers, and others. This provides quicker access to commonly used functions without having to navigate through the top menus.
-
Snap to Align
As you move layers, they will automatically snap to the edges of other layers or guides. This is a built-in alignment aid that helps maintain balance and symmetry without manually aligning every element.
-
Duplicate Before Making Permanent Changes
Before applying any filters, rasterizing text, or performing other destructive actions, duplicate the layer (Ctrl + J or Cmd + J). This preserves the original, giving you the flexibility to go back if needed.
These small habits and shortcuts can help streamline your workflow and reduce the risk of making irreversible mistakes. While simple, they are often what separate a casual edit from a well-organized, professional one. Developing these skills alongside your understanding of layer images will improve both the quality and efficiency of your projects.
Conclusion and Next Steps
Working with layers is one of the most important skills in image editing. Understanding how layers function, how they interact, and how to manage them properly will significantly improve both the quality of your work and the efficiency of your workflow. Whether you're organizing your compositions with layer groups, applying subtle edits with masks, or managing visibility with the Layers panel, each step plays a role in building polished, non-destructive edits.
This tutorial introduced how to add, move, duplicate, group, and merge photo layers in Photopea, along with how to use layer masks, keyboard shortcuts, and common features inside the Layers panel. As you continue editing, these techniques will become second nature and open the door to more advanced methods down the road.
After our intermediate skill level tutorials, our advanced skill level tutorials will teach about smart objects, complex masking, blend-if functionality, and multi-layer compositing. These skills will give you even greater control over your edits and prepare you for high-level image manipulation and design.
Mastering layer images begins with strong fundamentals. With the tools and techniques you've learned here, you're now equipped to build complex projects confidently and creatively.
