Overview
White balance correction is a fundamental part of image editing. It ensures that colors appear as intended by removing unwanted color casts caused by different lighting conditions. Accurate white balance brings realism to photographs by making whites appear truly neutral and maintaining the natural tone of surrounding colors.
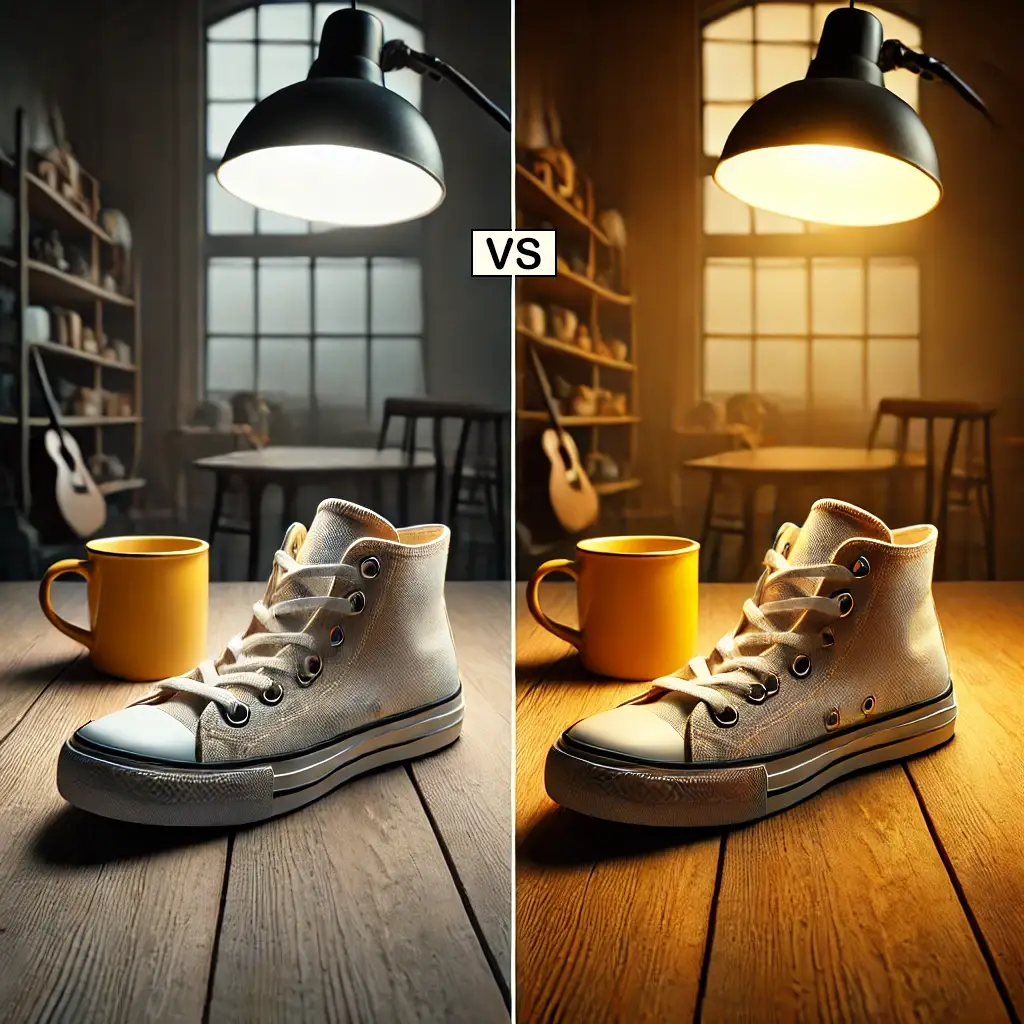
Different types of lighting can introduce varying color temperatures into an image. Indoor lighting may add a warm yellow tone, while fluorescent or overcast lighting often creates a cool blue cast. These shifts can make skin tones, products, or natural elements appear inaccurate. Correcting white balance restores the image to a more neutral and professional appearance.
Color accuracy is especially important in projects involving people, products, or environments where natural tone representation matters. Whether for print or digital use, images that reflect correct white balance carry more visual credibility and consistency. Consistent color across a collection of photos also strengthens the overall presentation of a project.
This tutorial explains how to locate and use white balance tools available in the editing workspace. It also outlines when each method is appropriate and how to apply adjustments with control. These principles support more accurate color management and build a foundation for professional image correction.
What is White Balance?
White balance adjusts how color appears in a photo by correcting the influence of the lighting used when the picture was taken. Different types of light can change how the camera records color. Some lighting adds a yellow tone, while others may cause a blue or green tint. This shift affects the way objects look, especially areas that should appear white or neutral.
Rather than changing the colors themselves, white balance tells the software what kind of light was present, so it can interpret the colors more accurately. This correction helps keep skin tones natural, backgrounds consistent, and objects clear of unwanted color influence.
Lighting conditions can vary from one photo to the next, even within the same session. For this reason, white balance is often adjusted after the photo is taken. Most editing programs include tools that can make this correction quickly, either manually or by selecting a reference point in the image that should appear neutral.
White balance is also useful for visual consistency when working with several images. Matching the color tone across a group of photos helps the collection look unified. Whether correcting minor shifts or applying intentional color tone changes, this control helps maintain a polished, finished appearance.
Why Would I Want to Use White Balance?
White balance plays an important role in both technical correction and creative control. While automatic settings often attempt to balance color temperature, they may fall short in scenes with mixed lighting or intentional stylization. Manual adjustment allows for greater precision, ensuring the image reflects either natural color accuracy or a deliberate mood.
Consistent white balance is essential in professional work. When photographing the same subject in different lighting conditions, the tone and color of the image can shift noticeably. For example, a white shirt may appear cream or blue depending on the light source. Adjusting white balance ensures consistency in how that subject appears across multiple images, which is important in product photography, branding, and commercial design.
Mood is another key reason to adjust white balance. Cooler tones tend to create a sense of distance, calm, or seriousness. Warmer tones suggest comfort, approachability, or emotion. These shifts can be achieved with subtle adjustments to color temperature rather than relying on filters or artificial tints. This approach offers more natural results, especially in portraiture and lifestyle photography.
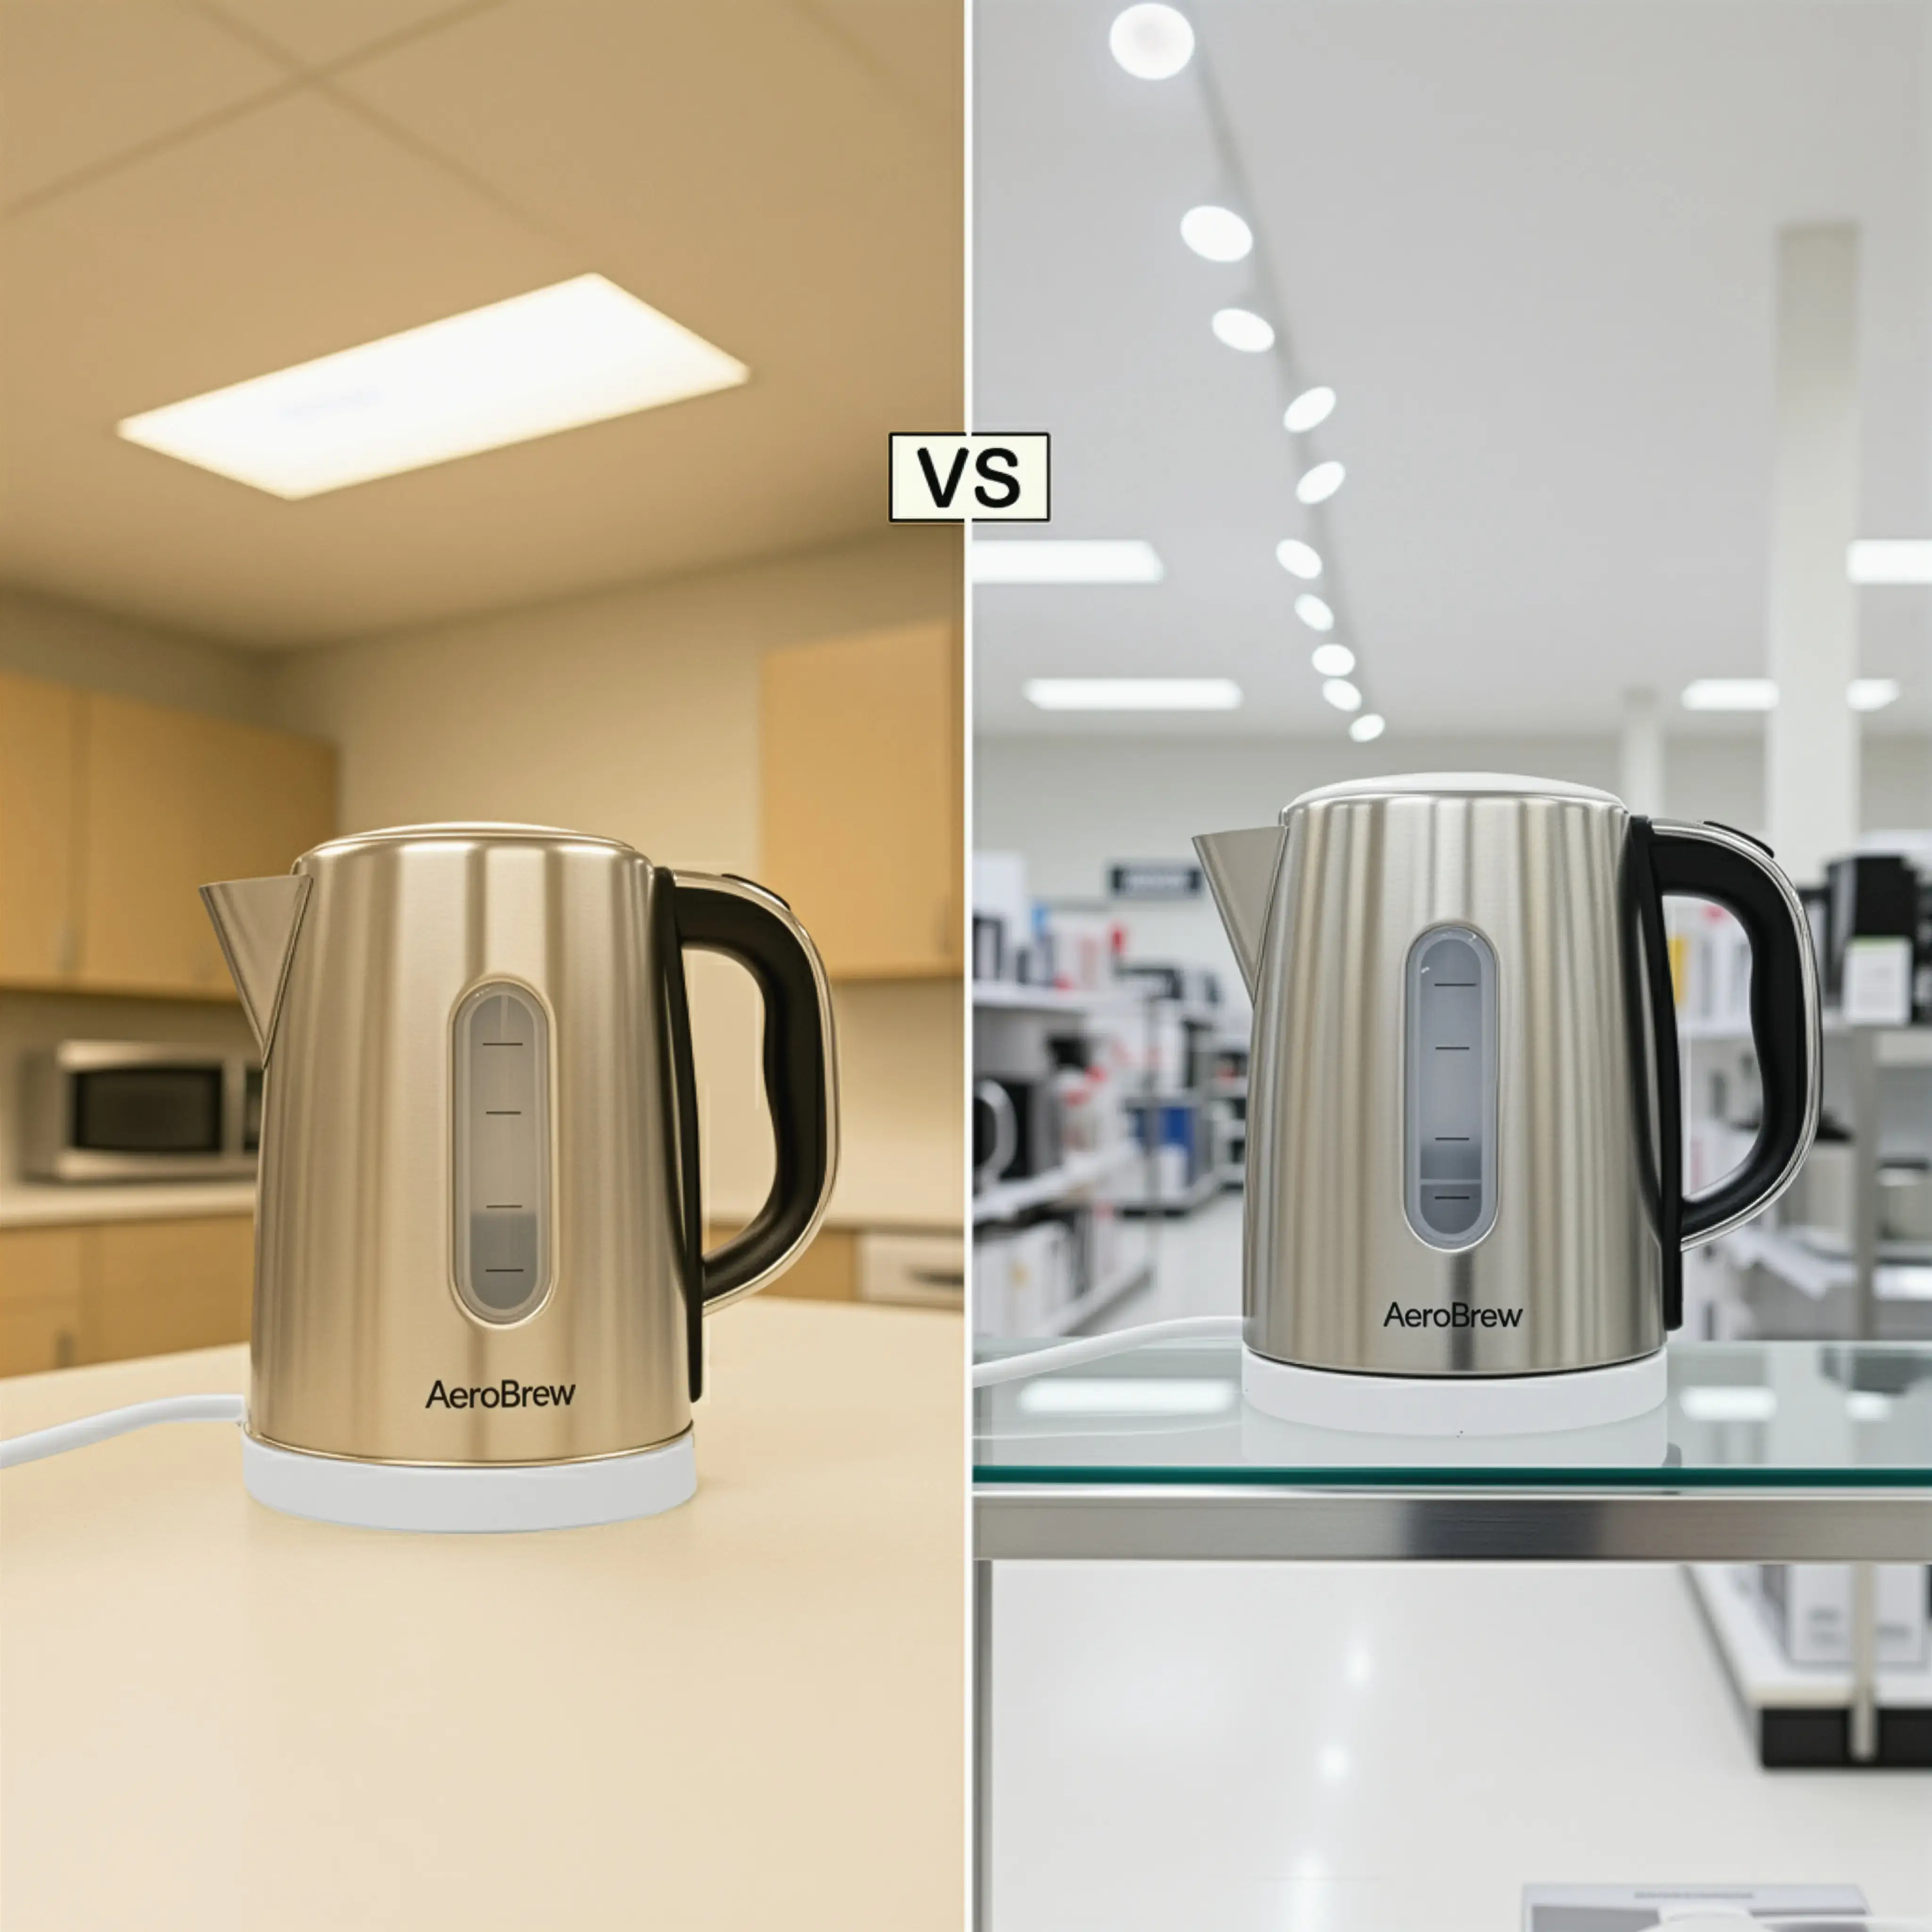
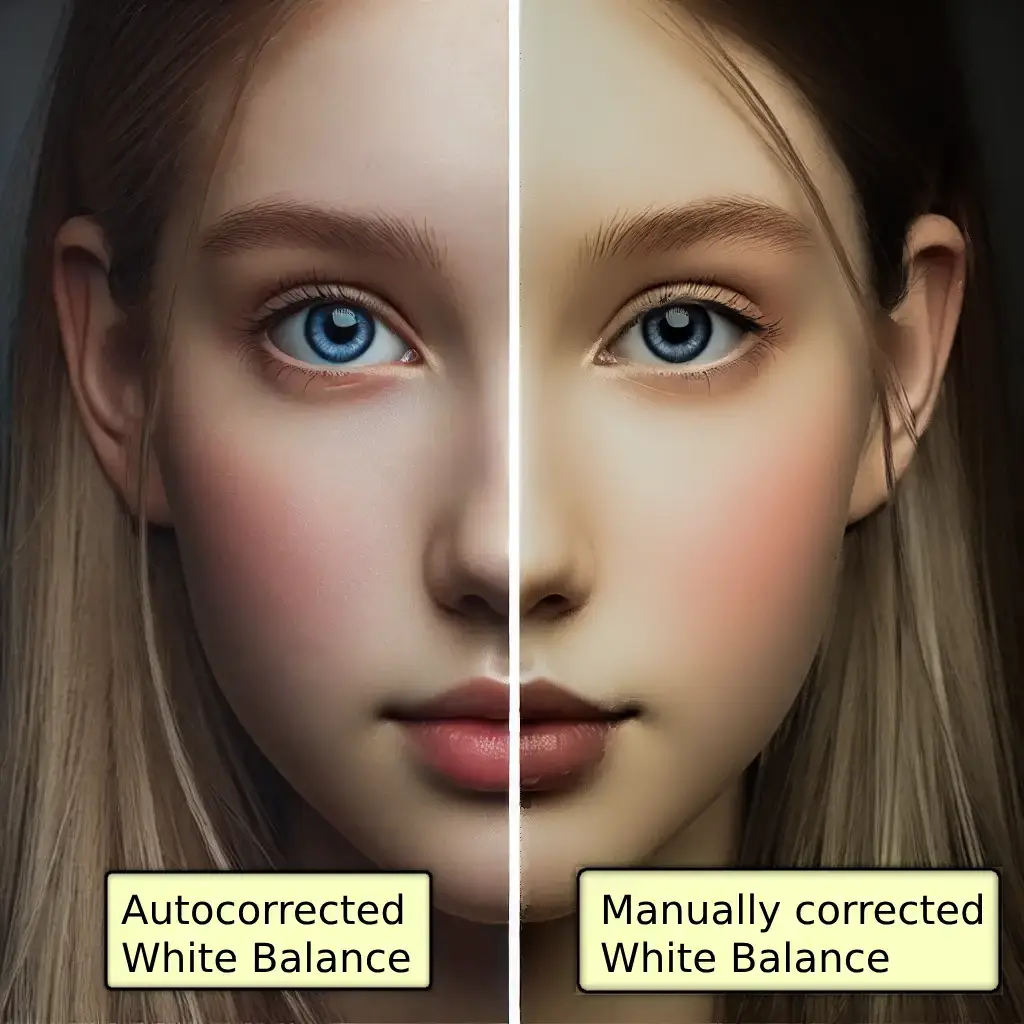
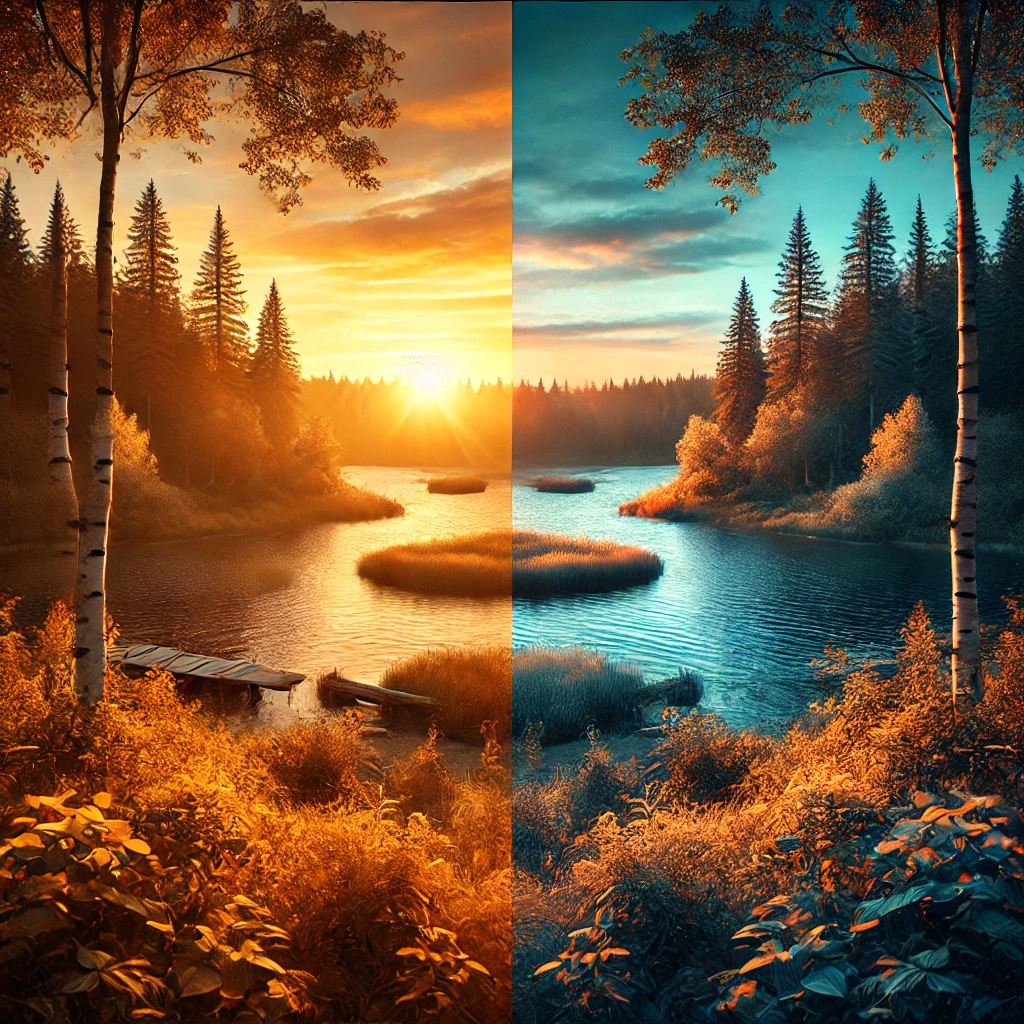
White balance in Photopea is useful for albums, portfolios, or promotional campaigns and quite often used in a series of side by side images. If each photo has a slightly different tone, the set may feel disconnected. Adjusting white balance ensures each image feels as if they belong together.
Here are some side by side images showing different examples of white balance:
What Tools in Photopea are Used to Control White Balance?
Photopea includes several tools that allow for precise control over white balance. Each tool works in a slightly different way and is suited to different stages of the editing process. These adjustments can be applied to correct unwanted color shifts or to refine the tone of an image for creative or professional purposes.
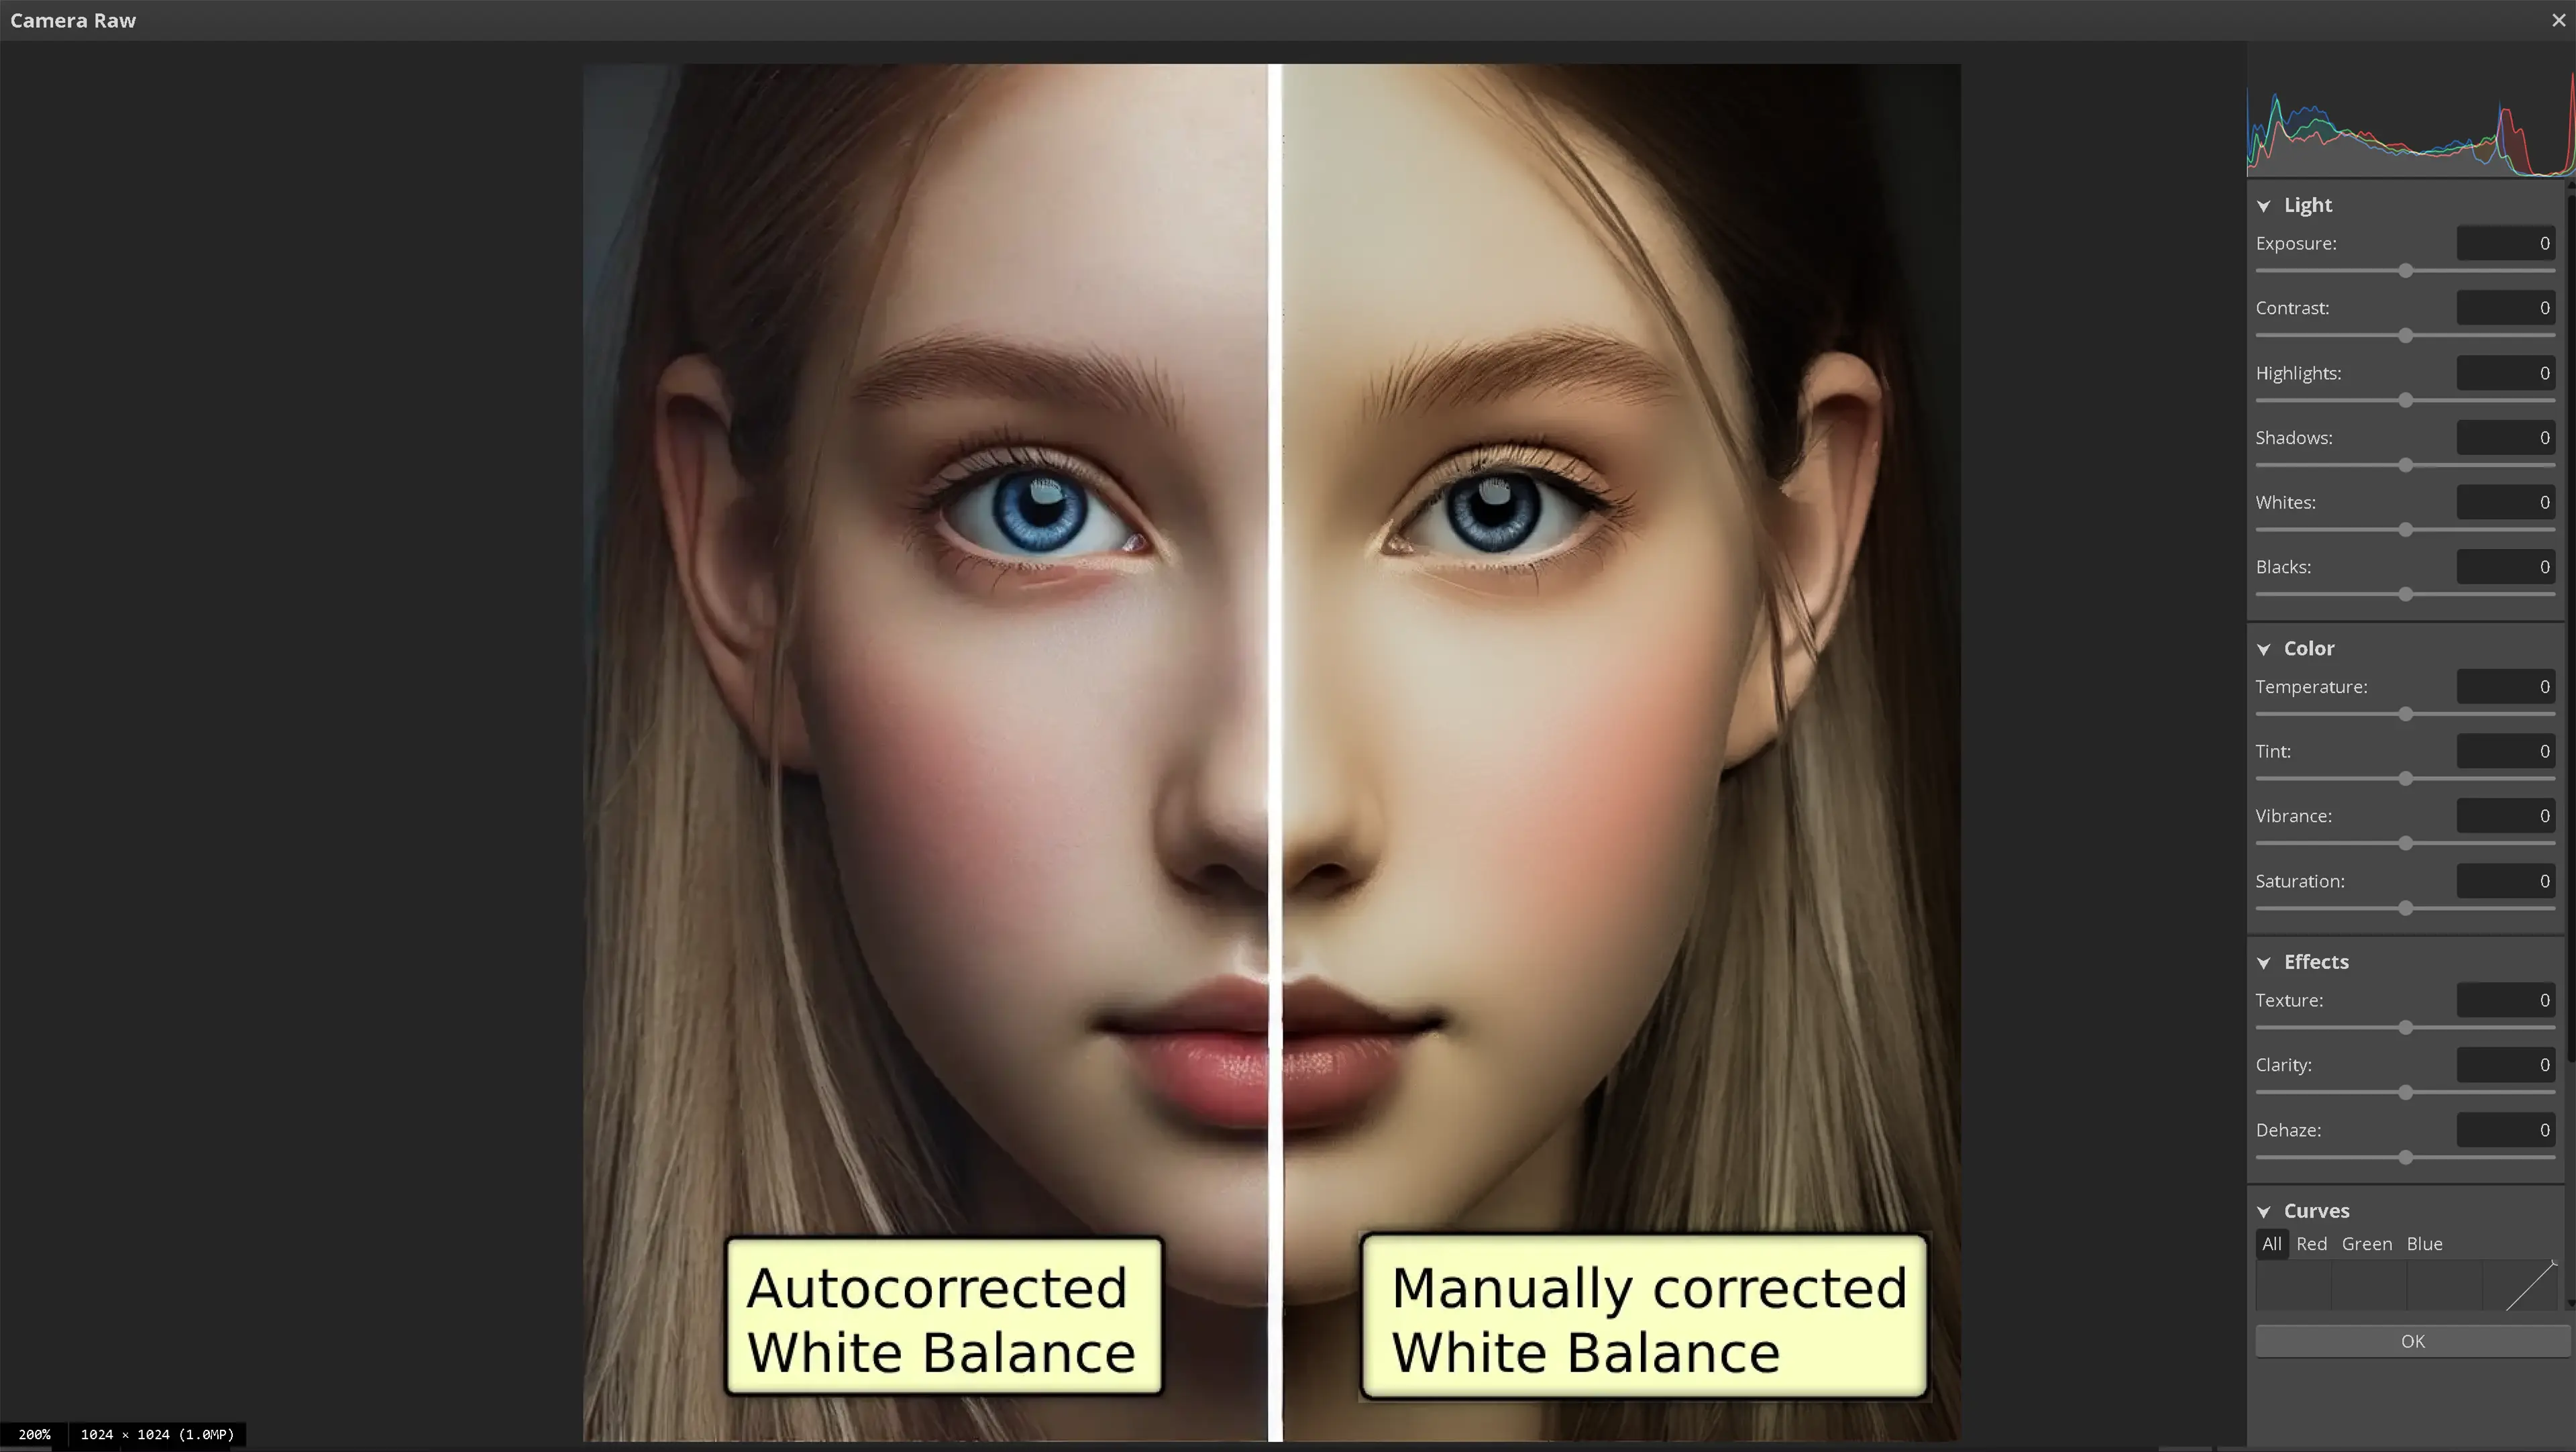
The Camera Raw filter is the most comprehensive tool available. To access it, go to the top menu and select Filter > Camera Raw Filter. This opens a separate panel with several sliders designed for tonal and color correction. The most important for white balance are Temperature and Tint, which directly address color casts. Once the adjustments are made, press OK to apply the effect. If the layer was not converted to a Smart Object, this change is permanent.
The Color Balance adjustment layer provides a flexible way to shift tone across specific regions of the image. To create one, go to Layer > New Adjustment Layer > Color Balance. This adds a new layer with sliders for Cyan/Red, Magenta/Green, and Yellow/Blue, which can be adjusted for Shadows, Midtones, and Highlights. This tool is useful for creative tone shaping or subtle white balance refinement.
Another option is the Levels adjustment layer, which provides channel-based tonal control. By selecting the Red, Green, or Blue channel from the dropdown, specific tonal shifts can be applied that affect the perceived color balance of the image. While not a direct white balance tool, it can support color correction by adjusting the distribution of tones within individual color channels.
Each of these tools serves a different purpose. Camera Raw is best for broad, precise correction. Color Balance is ideal for layered, flexible adjustments. The Levels in Photopea offer targeted tonal shaping. Together, they give the editor full control over white balance correction and enhancement.
Understanding the Camera Raw Filter for White Balance Adjustments
The Camera Raw filter in Photopea includes a series of sliders designed to adjust both color and tone. While temperature and tint are the primary white balance tools, the surrounding sliders allow for detailed refinement. Each one contributes to either the technical accuracy or the creative tone of the image. Below is a breakdown of each control, with explanations tailored for white balance correction and practical examples to support their use.
Temperature
This slider controls how warm or cool the overall image appears. Moving it to the right adds warm tones such as yellow and orange. Moving it to the left adds cooler tones such as blue. This is the primary control for correcting color cast caused by different types of lighting.
- Example: An image taken indoors under yellow light may look too warm. Move the slider left to around -15 to reduce the yellow tone. If the image was taken in shade and looks too cold, move it right to around +10 to restore natural warmth.
Tint
Tint adjusts the image along the green-to-magenta axis. If a photo has a greenish hue, increasing the tint will add magenta to balance it. If the image appears overly pink or magenta, lowering the tint will introduce green to even it out.
- Example: Fluorescent lighting can produce a green tint. Increasing the tint to around +15 helps balance skin tones and background color.
Exposure
Exposure changes the overall brightness of the image. This is useful before adjusting white balance, especially if the image is too dark or bright to evaluate color correctly.
- Example: If an image is underexposed and colors look muted or heavy, raising exposure by +0.30 to +0.60 helps restore clarity before making balance adjustments.
Contrast
Contrast increases or decreases the difference between the darkest and lightest parts of the image. Raising contrast can add definition and improve color clarity. Lowering contrast can soften transitions but may flatten the image.
- Example: After correcting white balance, increasing contrast by +10 to +20 can make neutral tones appear cleaner and add depth to the scene.
Highlights
This slider controls only the brightest parts of the image, such as reflections or light sources. Reducing highlights can bring back lost detail in overexposed areas. Increasing highlights adds brightness to the top end without affecting midtones.
- Example: If the background or a subject's face is too bright, reducing highlights to around -30 can restore natural light balance.
Shadows
Shadows affect the darkest parts of the image. Increasing shadow detail brightens dark areas without changing midtones or highlights. Lowering shadows can deepen contrast in the low end.
- Example: If shadow areas are too dark after adjusting balance, raise shadows to +20 or +30 to bring back hidden detail.\
Whites
Whites target the high end of the tonal range, refining the brightness of light areas. This is separate from highlights and is often used to finalize color accuracy after basic balance correction.
- Example: If the white areas still look gray or dull after adjusting temperature, raising the whites to +10 or +15 can help clean them up.
Blacks
This control adjusts the deepest shadows in the image. It is often used to anchor contrast or darken areas that feel too flat after other adjustments.
- Example: If the image appears washed out after raising shadows, lowering blacks by -10 can add clarity without affecting the midtones.
Vibrance
Vibrance increases the saturation of muted or less prominent colors. Unlike saturation, it protects already bright or skin-tone areas from becoming oversaturated.
- Example: If adjusting white balance softens the image's overall color, increasing vibrance to +15 or +25 helps restore richness without pushing the image too far.
White balance adjustments often begin with temperature and tint but are best supported by fine-tuning the surrounding tonal sliders. These settings work together to deliver a clean, color-accurate image.
Basic Introduction to Smart Objects
A smart object is a type of layer that preserves the original image data, allowing edits such as filters to be applied without permanently altering the layer. This makes it possible to revisit and change settings later without degrading image quality. When working with the Camera Raw filter, converting the image to a smart object keeps the white balance and tonal adjustments editable.
A general introduction to smart objects can be found in our advanced Photopea tutorials, where the concept and its advantages are explained. More detailed guidance on using smart objects in layered workflows is also included in those advanced tutorials.
Troubleshooting Tips for Camera Raw in Photopea
Occasionally, the Camera Raw filter in Photopea may appear to apply no visible changes after clicking OK. This can happen for a number of reasons and does not always indicate an error in your adjustment settings. Below are common causes and practical fixes:
-
The Layer is Empty or Transparent
Make sure the selected layer contains visible pixels. If applying Camera Raw to a transparent or empty layer, no changes will appear. -
Refresh Photopea and Reopen the File
In some cases, especially if Photopea has been open for a long time or running many operations, the filter may appear broken. Refreshing the browser and reopening the image can resolve this. This step is often the simplest and most effective fix. Refreshing the browser will close your image.
Practice Example
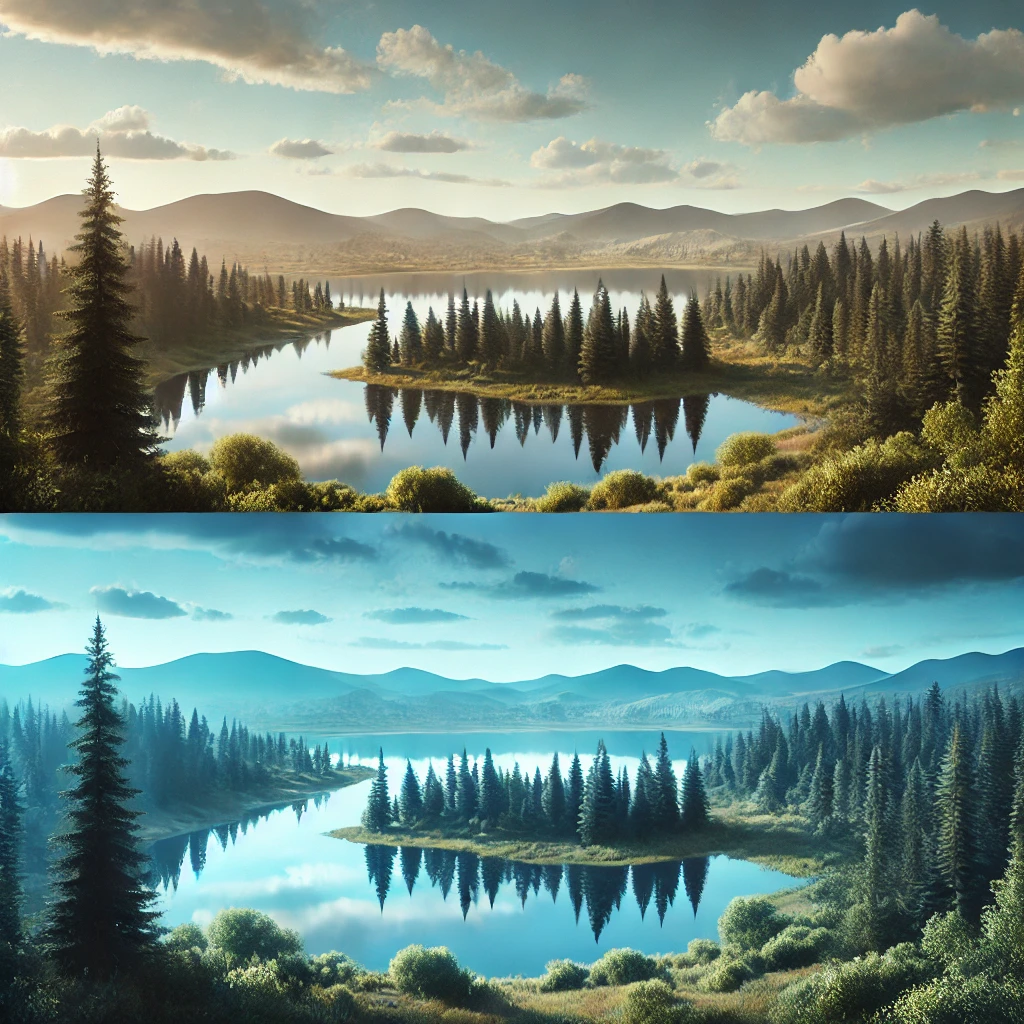
This image is designed for white balance correction practice. The top half shows proper white balance with natural colors and lighting. The bottom half has an incorrect white balance, showing a strong blue color cast. Use the Camera Raw filter in Photopea to adjust the white balance by modifying Temperature, Tint, and Vibrance until the image tones match. This is a useful way to reinforce how white balance correction works in real editing.
